
TECH: FIXING YOUR CLUTCH – If your clutch is slipping more than a rapper’s trousers, here’s what you need to do to fix it…
Aside from death and taxes, there’s another thing you can be sure of – ride your dirt bike for long enough and sooner or later you’re going to have to replace the clutch. The time it’ll go will be halfway up a steep gnarly hill, in the middle of a momentum-sucking bog or in a sea of giant sand dunes.
If this is your first time tackling the task of clutch-plate replacement, you’ll be comforted to know that the procedure is reasonably simple and the tools required are fairly few. In fact, there’s very little that can go wrong so long as you’re careful and take your time.
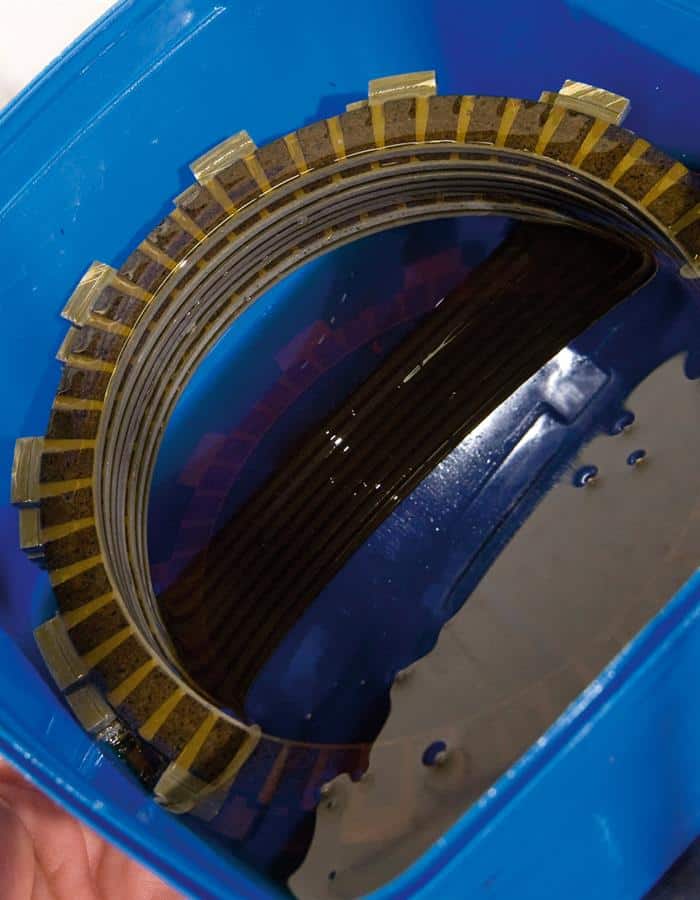
Before you get started make sure you have a clean work area and all the tools you need. The first thing to do before you get into the job properly is to slip your new clutch (friction) plates into a bath of oil so that they can be busy soaking up some oil. This gives the clutch a fighting chance of working first time you use it. Okay, let’s get into it!
Before You Start
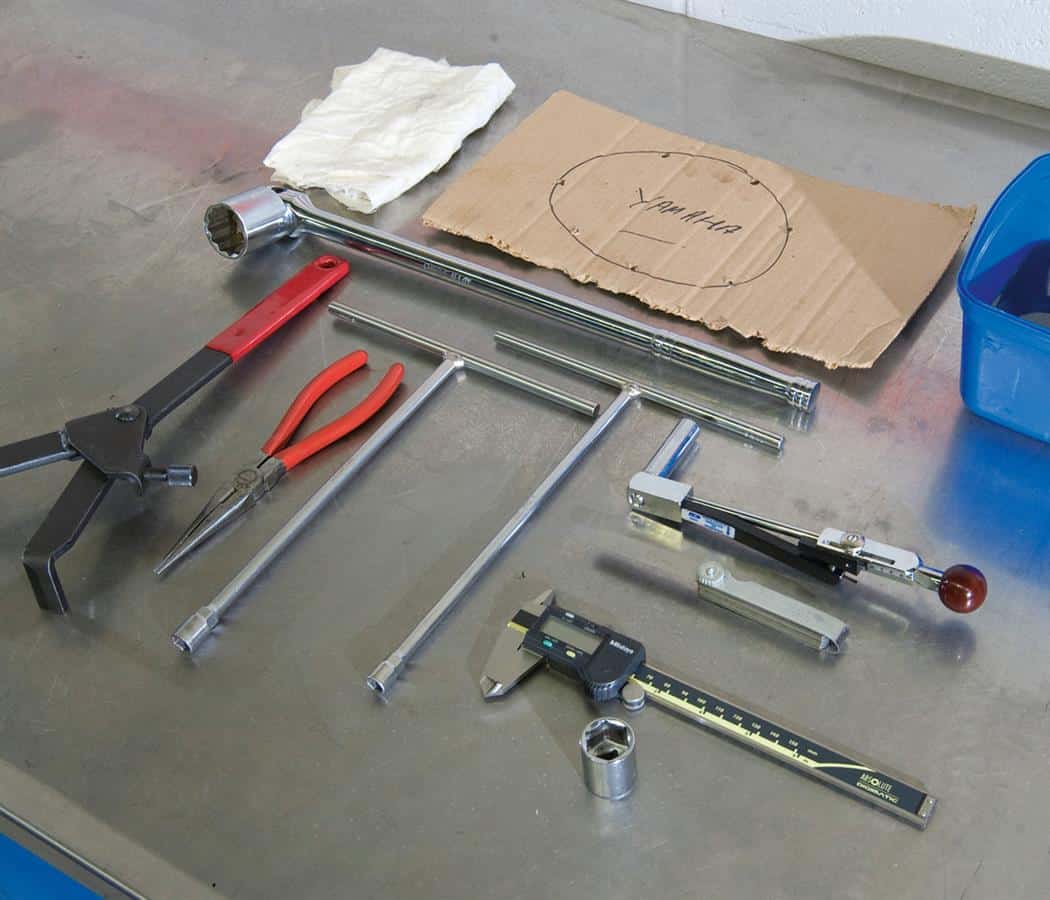
If you simply want to change the clutch plates you’ll need 8mm and 10mm T-bars, needle-nose pliers or a Phillips screwdriver (for relocating dowels), a container of oil (to soak the new friction plates in) and a torque wrench and sockets. If you’re inspecting for wear in the hope of getting some extra life out of your existing clutch, you’ll also need to arm yourself with a vernier caliper and feeler gauge, a perfectly flat block (to check for plate warpage). And if you plan to replace your entire clutch basket, you’ll need to add to the list a new tab washer and a clutch-holding tool. In general clutch springs will last a good few years before needing replacement, so if this is the first new clutch in your bike it’s probably not worth bothering with new clutch springs just yet.
Below left: Find a suitable container for soaking the clutch friction plates in. Below right: The tools you’ll need to get the job done…
1: Having drained all the oil out of your bike’s sump first, the easiest way of doing this job is to put the bike’s handlebars onto full right lock then lean it all the way over to the left, and place the left bar on a bike stand. This way all the remaining oil will drain to the left side of the engine, rather than over you, and access to the clutch is nice and easy.
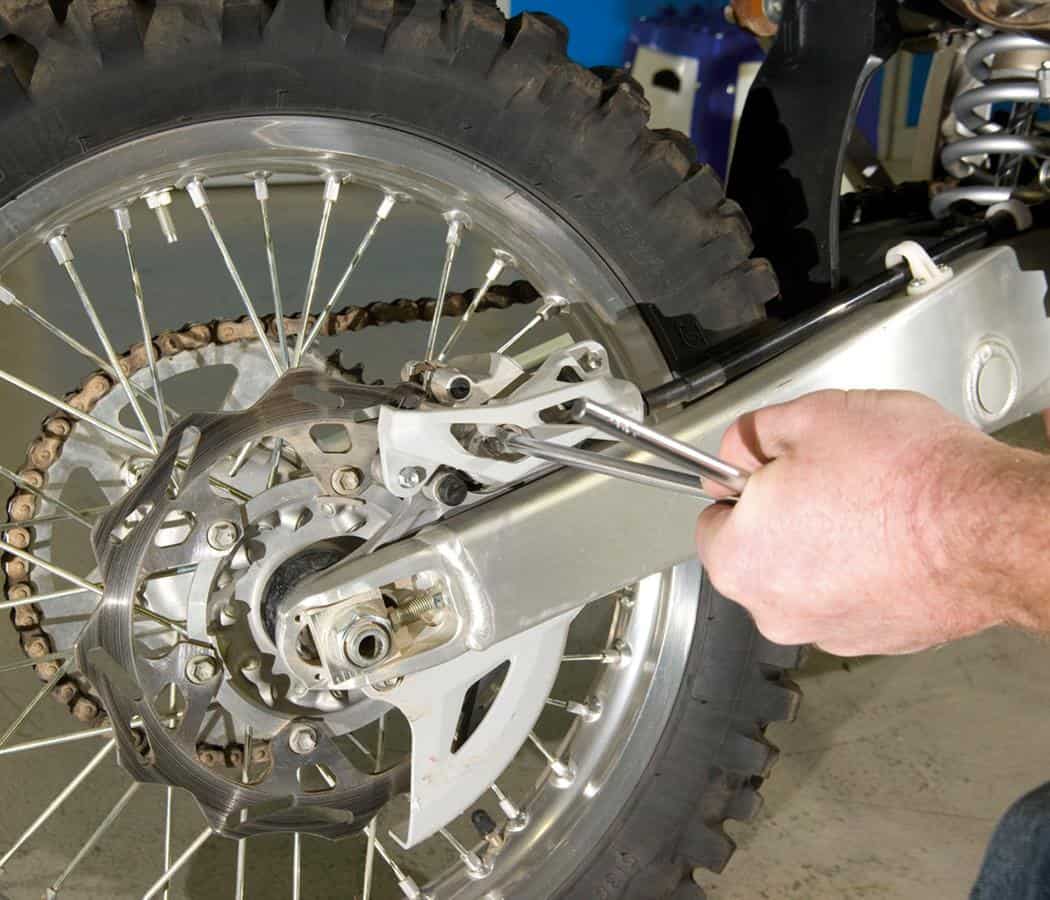
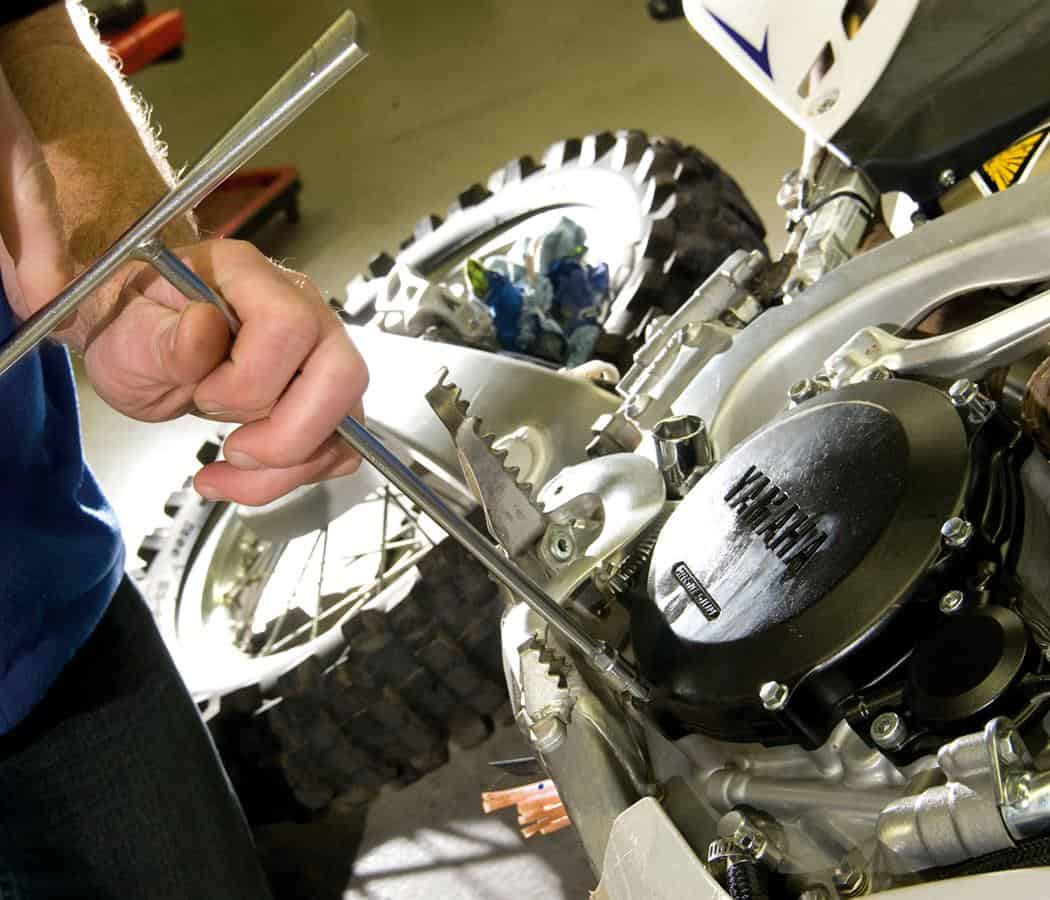
2: Now push the rear brake caliper in against the rear brake disk with a T-bar to give you enough freeplay to move the brake pedal right down.
Below Left: Lay the bike down as shown. Below right: Pushing the rear caliper back.

3: Slip a socket between the brake pedal and the frame (into the recess where the swingarm axle goes through), to hold the pedal down and out of the way of the clutch cover.
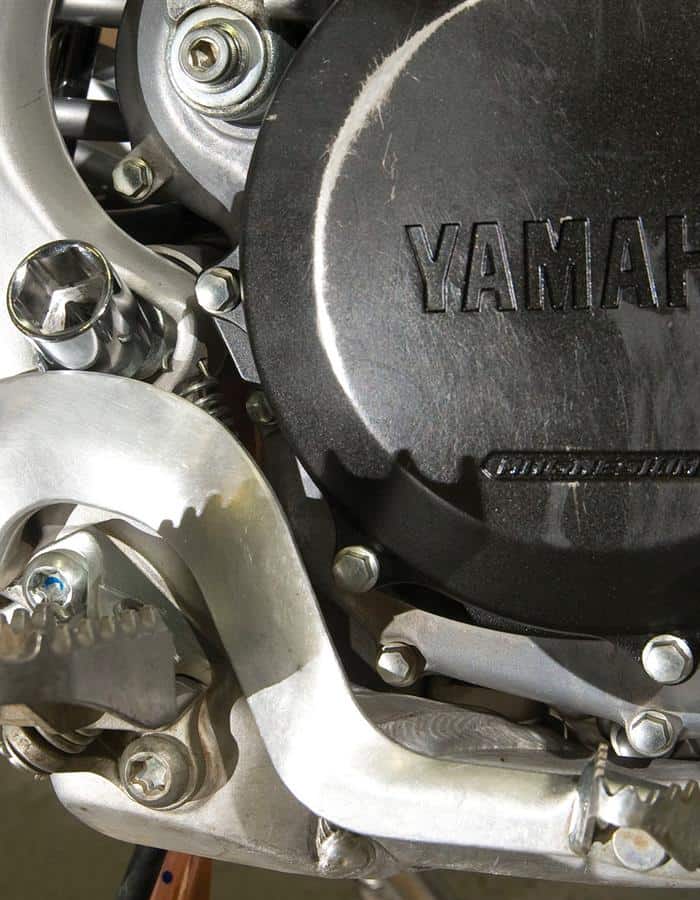
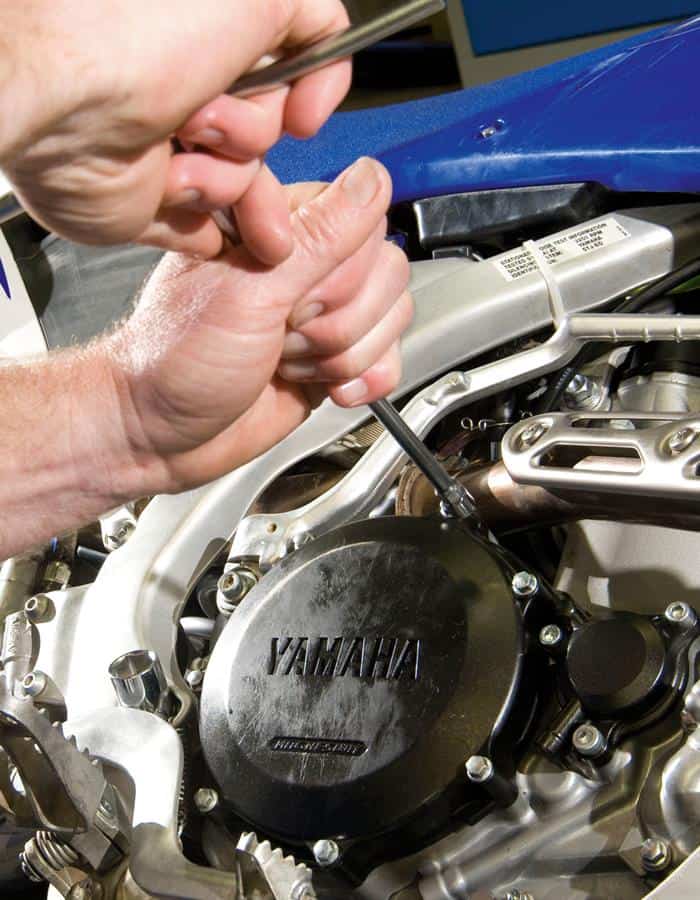
4: Remove the outer clutch cover in a diagonal sequence, undoing each bolt on the opposite side from the last one. This is important so you don’t warp the clutch cover.
Below left: Locking the rear brake. Below right: Removing clutch cover.
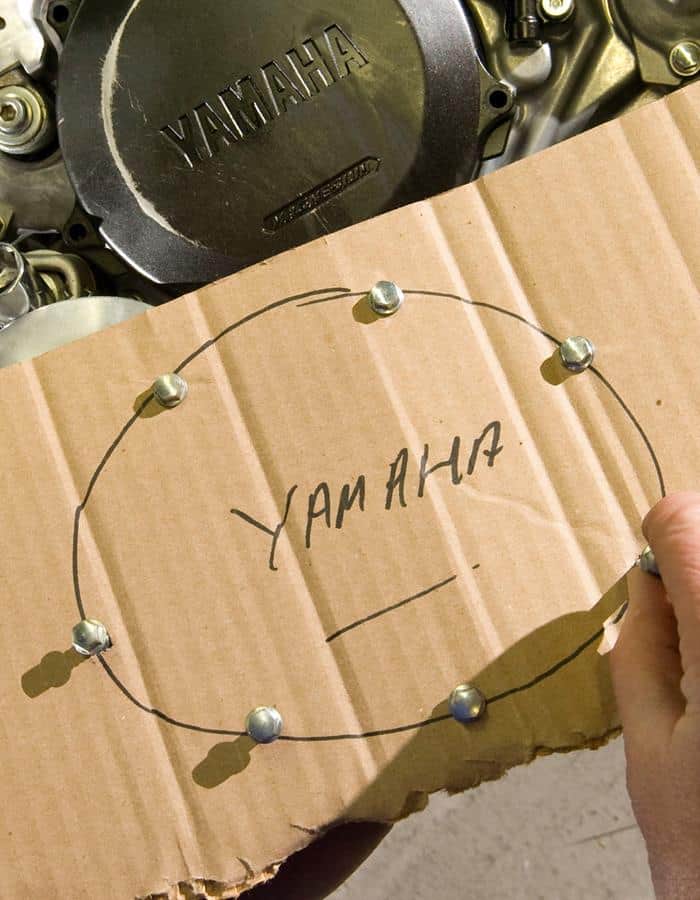
5: As there are three different lengths of clutch cover bolt on the WR-F, it’s a good idea to draw a cardboard template of your clutch cover, puncture the position of each bolt hole with a Phillips screwdriver, and slip in each bolt as it’s removed.
6: Although you should ideally replace the gasket every time you service the clutch, if you’re in a position where you need to reuse it, be careful not to rip the gasket as you remove the clutch cover.
Below left: Make sure you know which bolt goes where. Below right: Ideally replace the clutch cover gasket.
7: Make sure you have both clutch cover dowels in sight as it’s possible for them to come off with the cover and get lost or accidentally dropped behind the clutch basket. If one has come off with the cover, you can use either needle nose pliers to reinsert it in the engine case or slip it over a screwdriver, locate the end in the hole and slide the dowel safely into place.
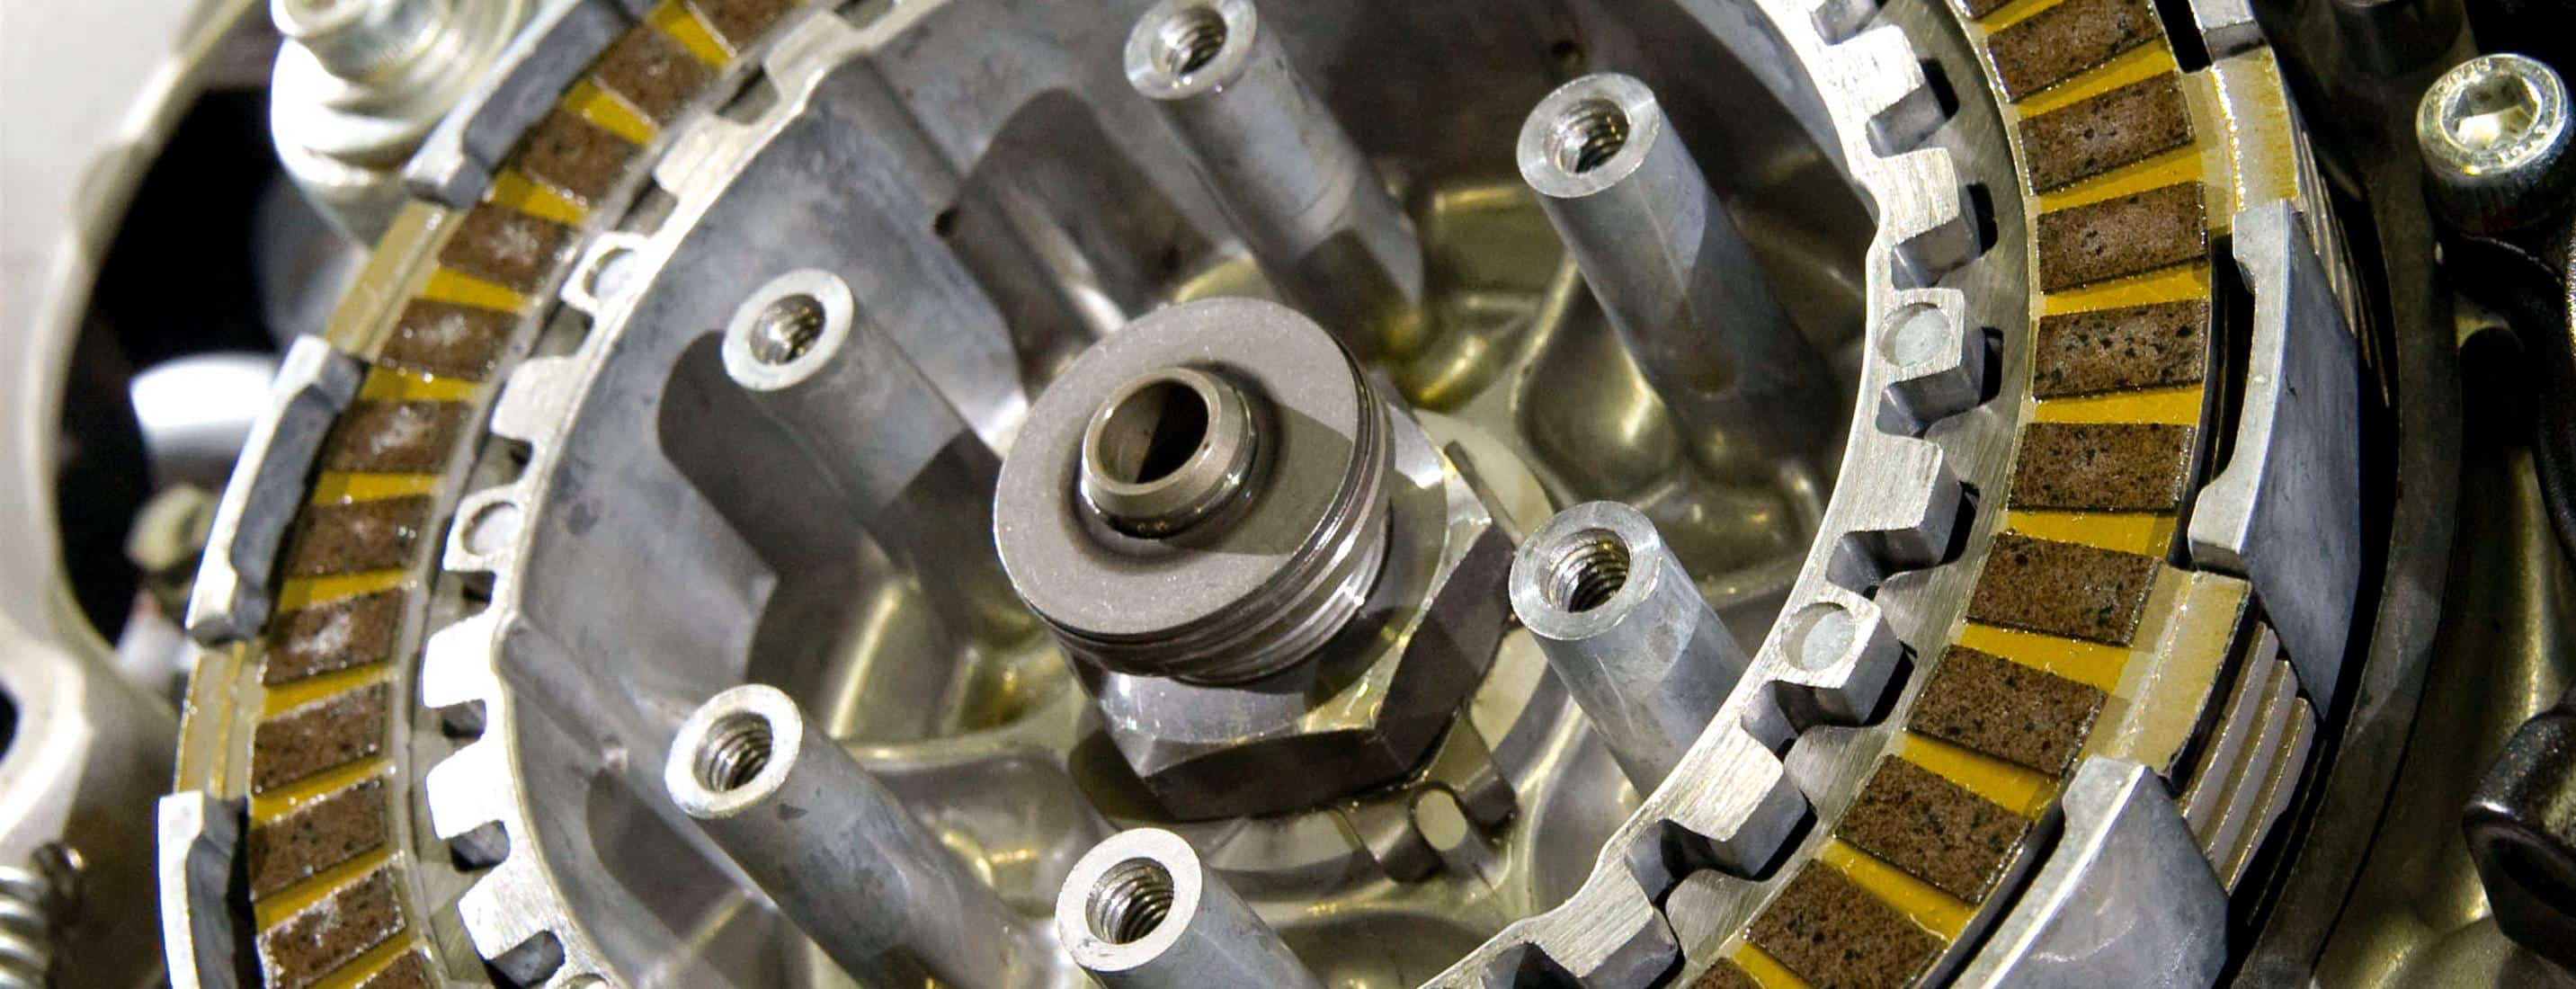
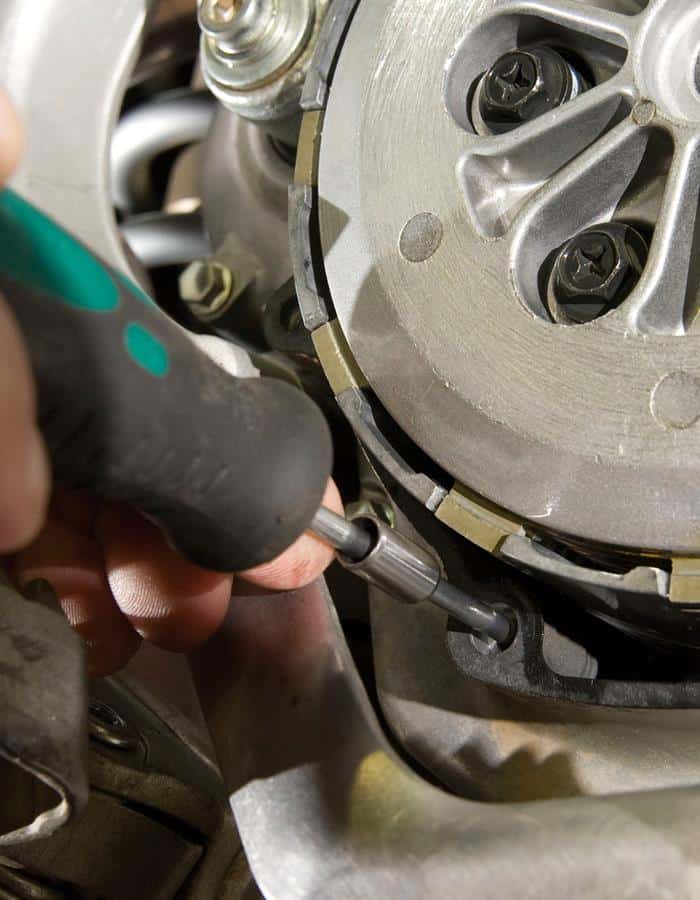
8: Next undo the clutch bolts in a diagonal pattern so there’s no warpage issues and so the springs stay seated correctly. Remove the bolts and springs, the clutch plate cover and then the clutch plates and ‘steels’ keeping them in the correct order (so you know for reassembly with the new ones).
Below left: Make sure you don’t lose the clutch cover dowels. Below right: Undo the clutch bolts.
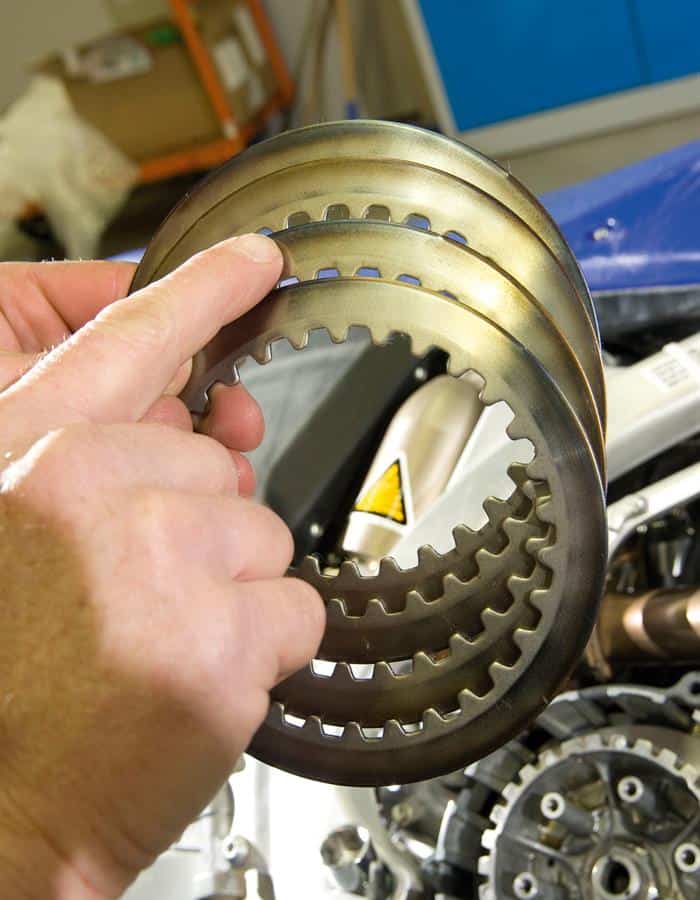
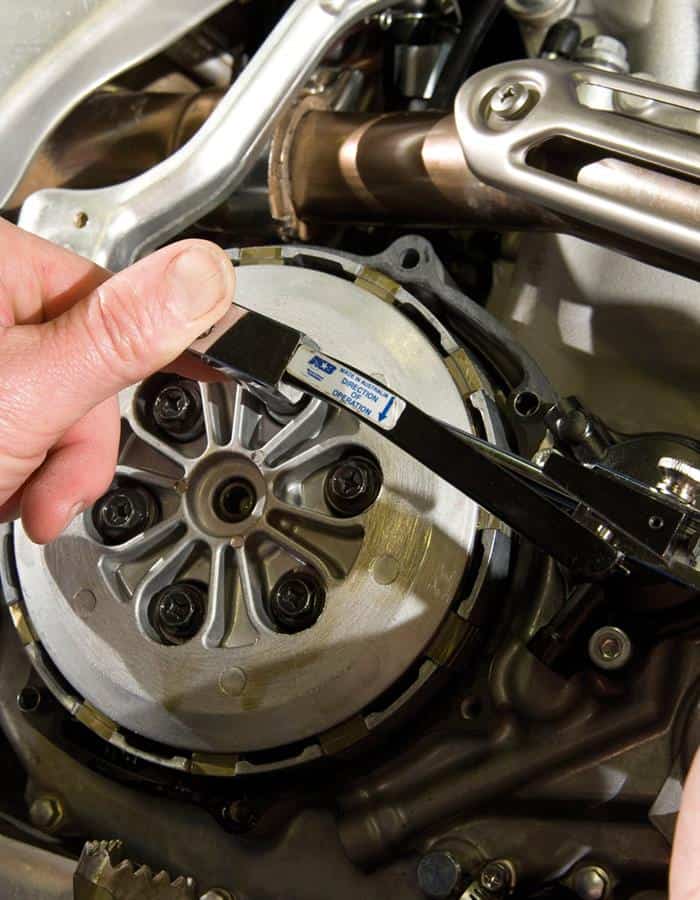
9: Inspect the steel plates for any discolouration that would indicate overheating, and using a perfectly flat surface and a feeler gauge, check for any signs of warpage.
Below left: Check the plates for warpage.
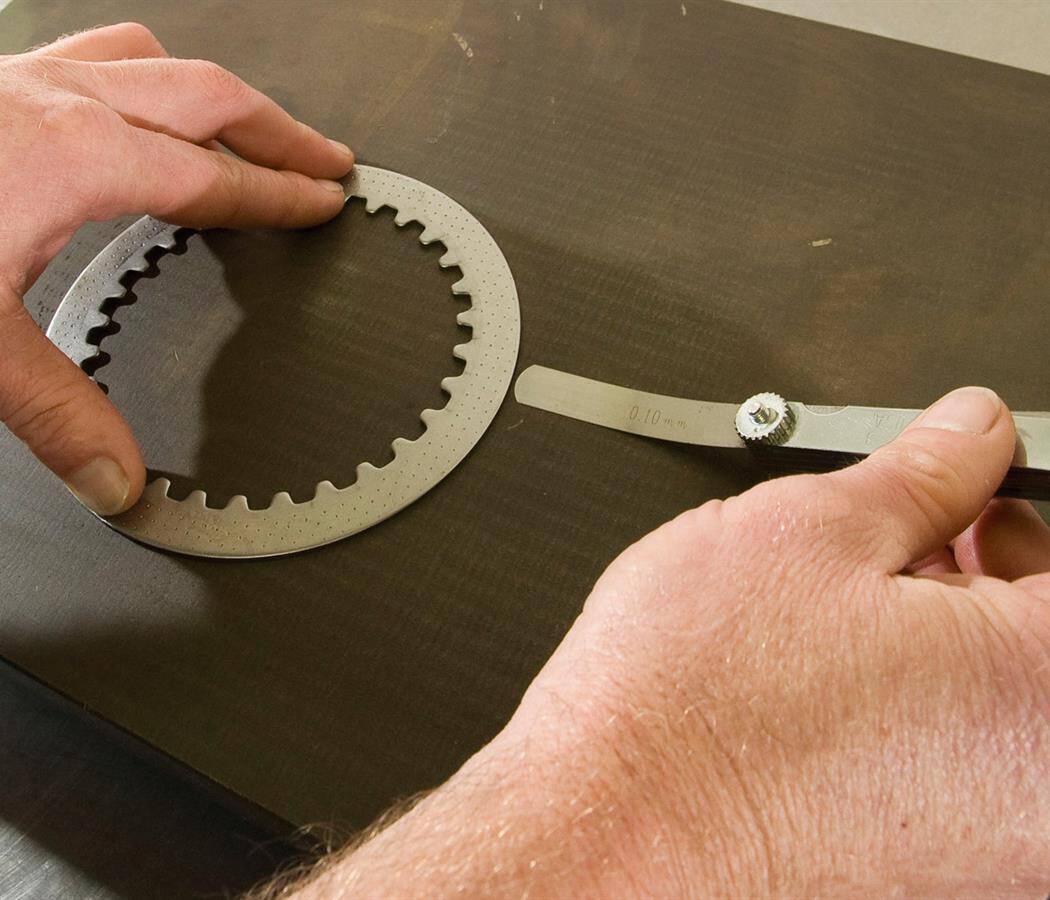
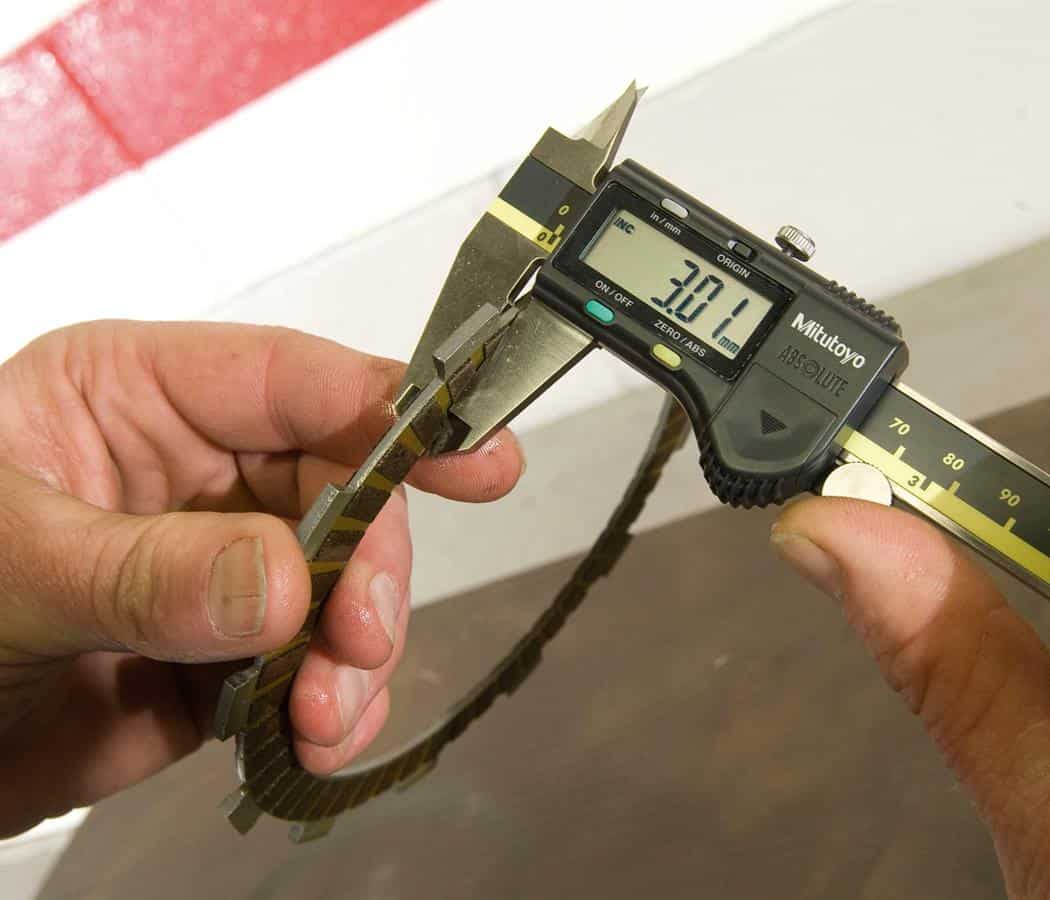
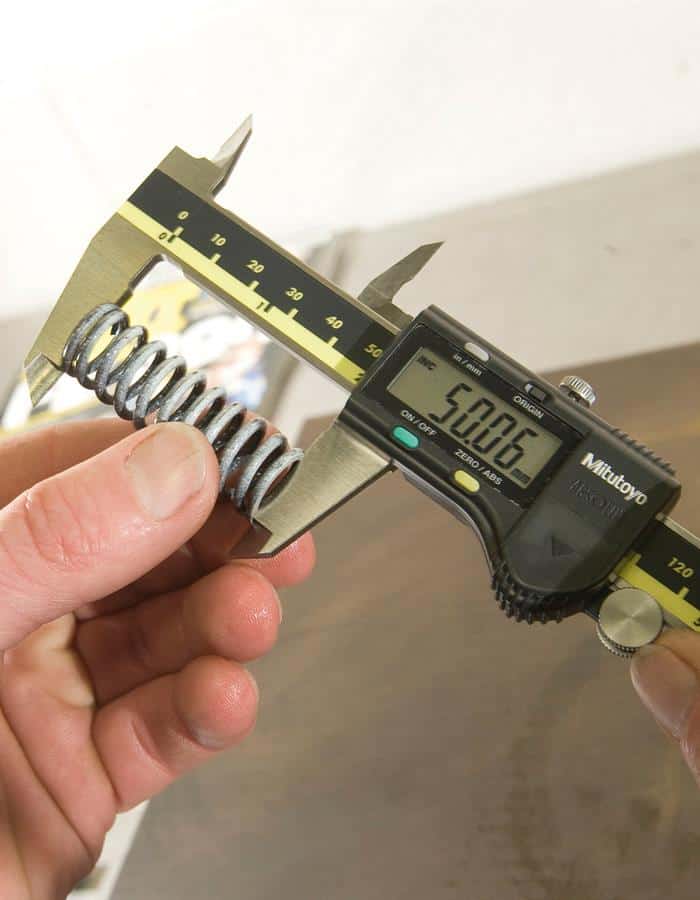
10: Even though we’re replacing the fibre plates, it’s always worth checking the old ones to see if they’ve overheated, or just worn out. Look out for a burnt smell and black discolouration on the fibre plates – sure signs of overheating. And while you’re at it, check the clutch springs and old friction plates for wear using a vernier caliper. See your manual for tolerances.
Below: Check and measure everything.
11: Do a visual inspection of your clutch basket looking for any grooves worn into the inner and outer basket by the plates. If the grooves have a sharp edge the plates can get caught and that affects the release and engagement of your clutch. Small ridges can be gently filed off (with the basket removed from the engine of course), but larger ridges will mean fitting a replacement basket.
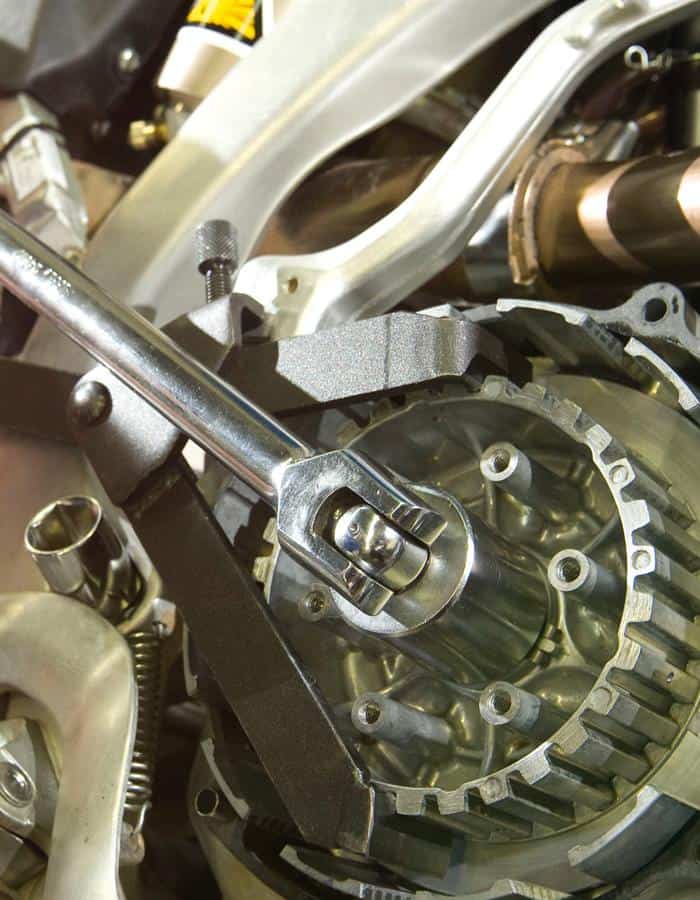
12: If your clutch basket needs replacing, or you’re upgrading to a hardwearing anodised item, some sort of clutch holding tool will generally be required to immobilise the basket while undoing the centre nut. If you have access to air tools then you can usually remove the centre nut with a rattle-gun, but either way make sure you tighten the centre nut back to the torque setting in your manual and fit a new lock-washer at the same time.
Below: Check clutch basket carefully for wear

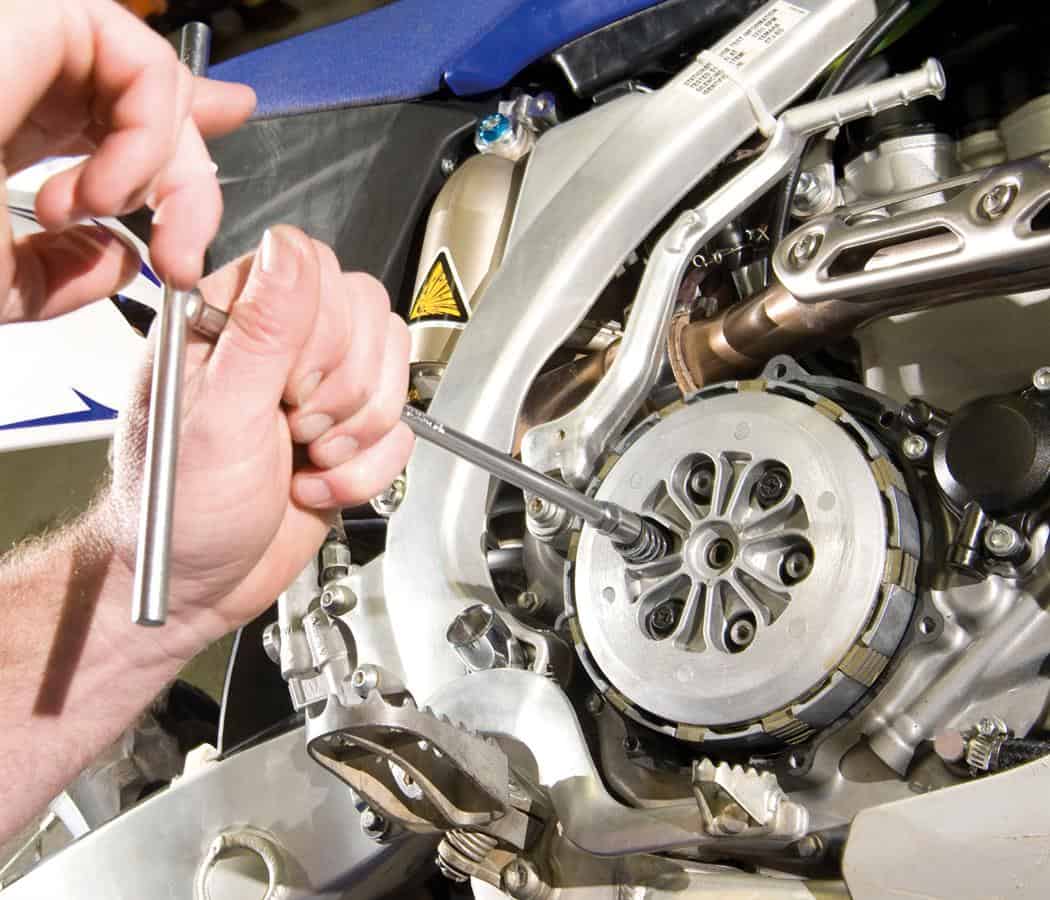
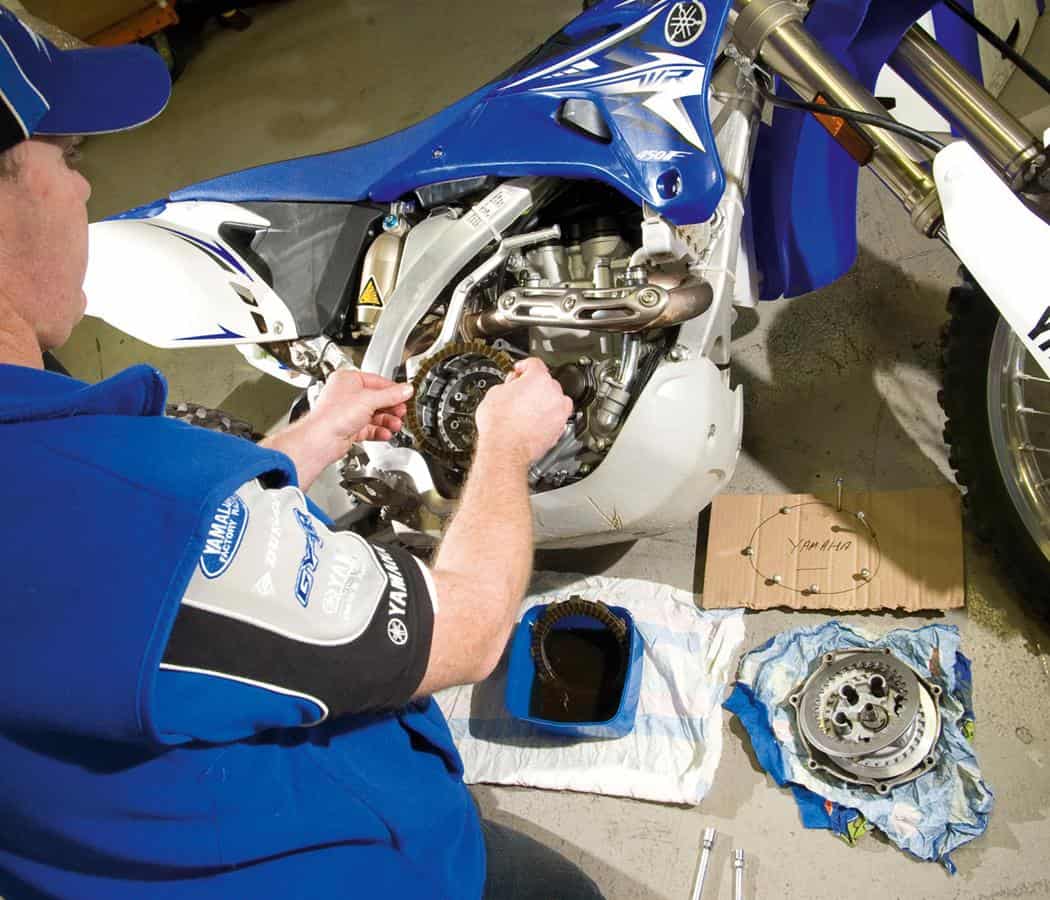
13: With the steels and nicely oiled friction plates separated into two stacks, first slide a friction plate into the basket and then alternate between the two stacks until they’re all installed. Yamaha clutch plates have a rolled edge (which must face inward) and a sharp edge, while each friction plate has a painted tab that should be lined up with the others. Some bikes have plates of different thicknesses to fit their basket depth that need to be installed in the order that they were removed.
14: Slip the basket cover on and drop in the springs and screw the clutch bolts in finger tight. Next, tighten the clutch bolts in a diagonal sequence with a T-bar. It’s easy to over tension them and break the alloy post they screw into, so make sure you use a torque wrench to tighten to the specs in your manual.
Below left: Make sure the plates are the correct way round. Below right: Replace the bolts in a diagonal sequence.
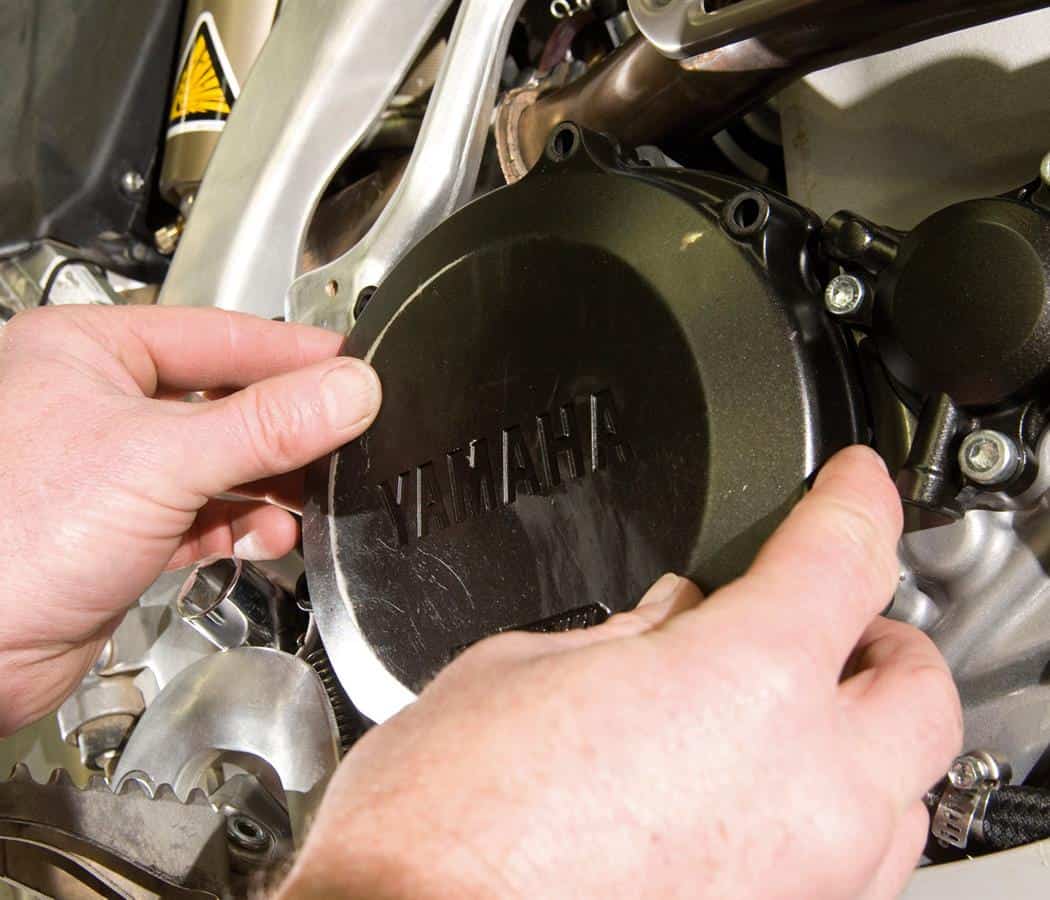
15: Carefully place the clutch cover over your new gasket, taking care with the positioning of the dowels, drop your bolts into the right holes and retighten with a T-Bar in a diagonal sequence.
16: Lastly, remove the socket from the swingarm recess (remembering to pump the lever to restore the brakes) and adjust the clutch freeplay at the lever, and away you go…
Below left: Replace the clutch cover. Below right: Adjust everything and away you go…
2 Responses
Steel plate go on second. Fiber plates first and last. Christ.
Rick, you are quite correct. This is a reprint of an old TBM article, sourced from Australia. As we know, lots of thing go counter-clockwise counter-season etc in Australia. But clutch plates? Doubt it. Good spot (Melber must have missed it originally – let’s blame him!). Text now corrected.