
Winter is the ideal time to rebuild your four-stroke, but there’s still time before summer comes. Here’s what you need to know…
Most riders like to get their hands dirty to some extent, spannering away on their bike to the best of their ability and only calling on their dealer’s service department when the job at hand is outside their realm of capability – a realm which (these days) invariably involves four-stroke engines.
Why? Well let’s not shy away from the fact that if you make a mistake assembling a four-stroke dirt bike motor, the consequences can be expensive. Stuff up the power valve on a smoker and it will run like a two-legged dog, but do no real damage. But mess up the cam timing on your four-stoke, and you will unleash merry hell inside your engine.
But remember… your bike’s cam timing is not rocket science. Check and double check that the rotating assembly is at Top Dead Centre (TDC) and that the timing marks are correctly positioned before you put the lid back on it and you can’t really have any problems to do with your cam timing. You can’t even mix up the inlet and exhaust cams – each won’t fit in the other’s cradle. Getting the maths wrong when shimming your valves can be frustrating, but similarly to the cam timing, as long as you double check that it’s correct before starting the bike, you can’t go wrong.
Most other engine assembly practices such as installing the piston, preparing the gasket faces and correctly torquing down the head are no different to rebuilding a two-stroke, so if you’re comfortable doing that, then you should be able to do this.
So to guide us through the process of freshening up your bike’s top-end we enlisted the help of ‘Doctor’ Ross McWatters at the Aussie KTM Race Team workshop to help us get to the bottom of things
Should I be scared?
‘I don’t think anyone should be scared of doing maintenance work on their four-stroke, but they should definitely have a respect for it,’ said Ross. But it’s that cam timing business that everyone’s afraid of. There’s a perception out there that it’s some kind of black art, and for the fear of bent valves in the event of a minor oversight, most owners keep the tappet cover firmly fixed on their four-bangers at all times.’
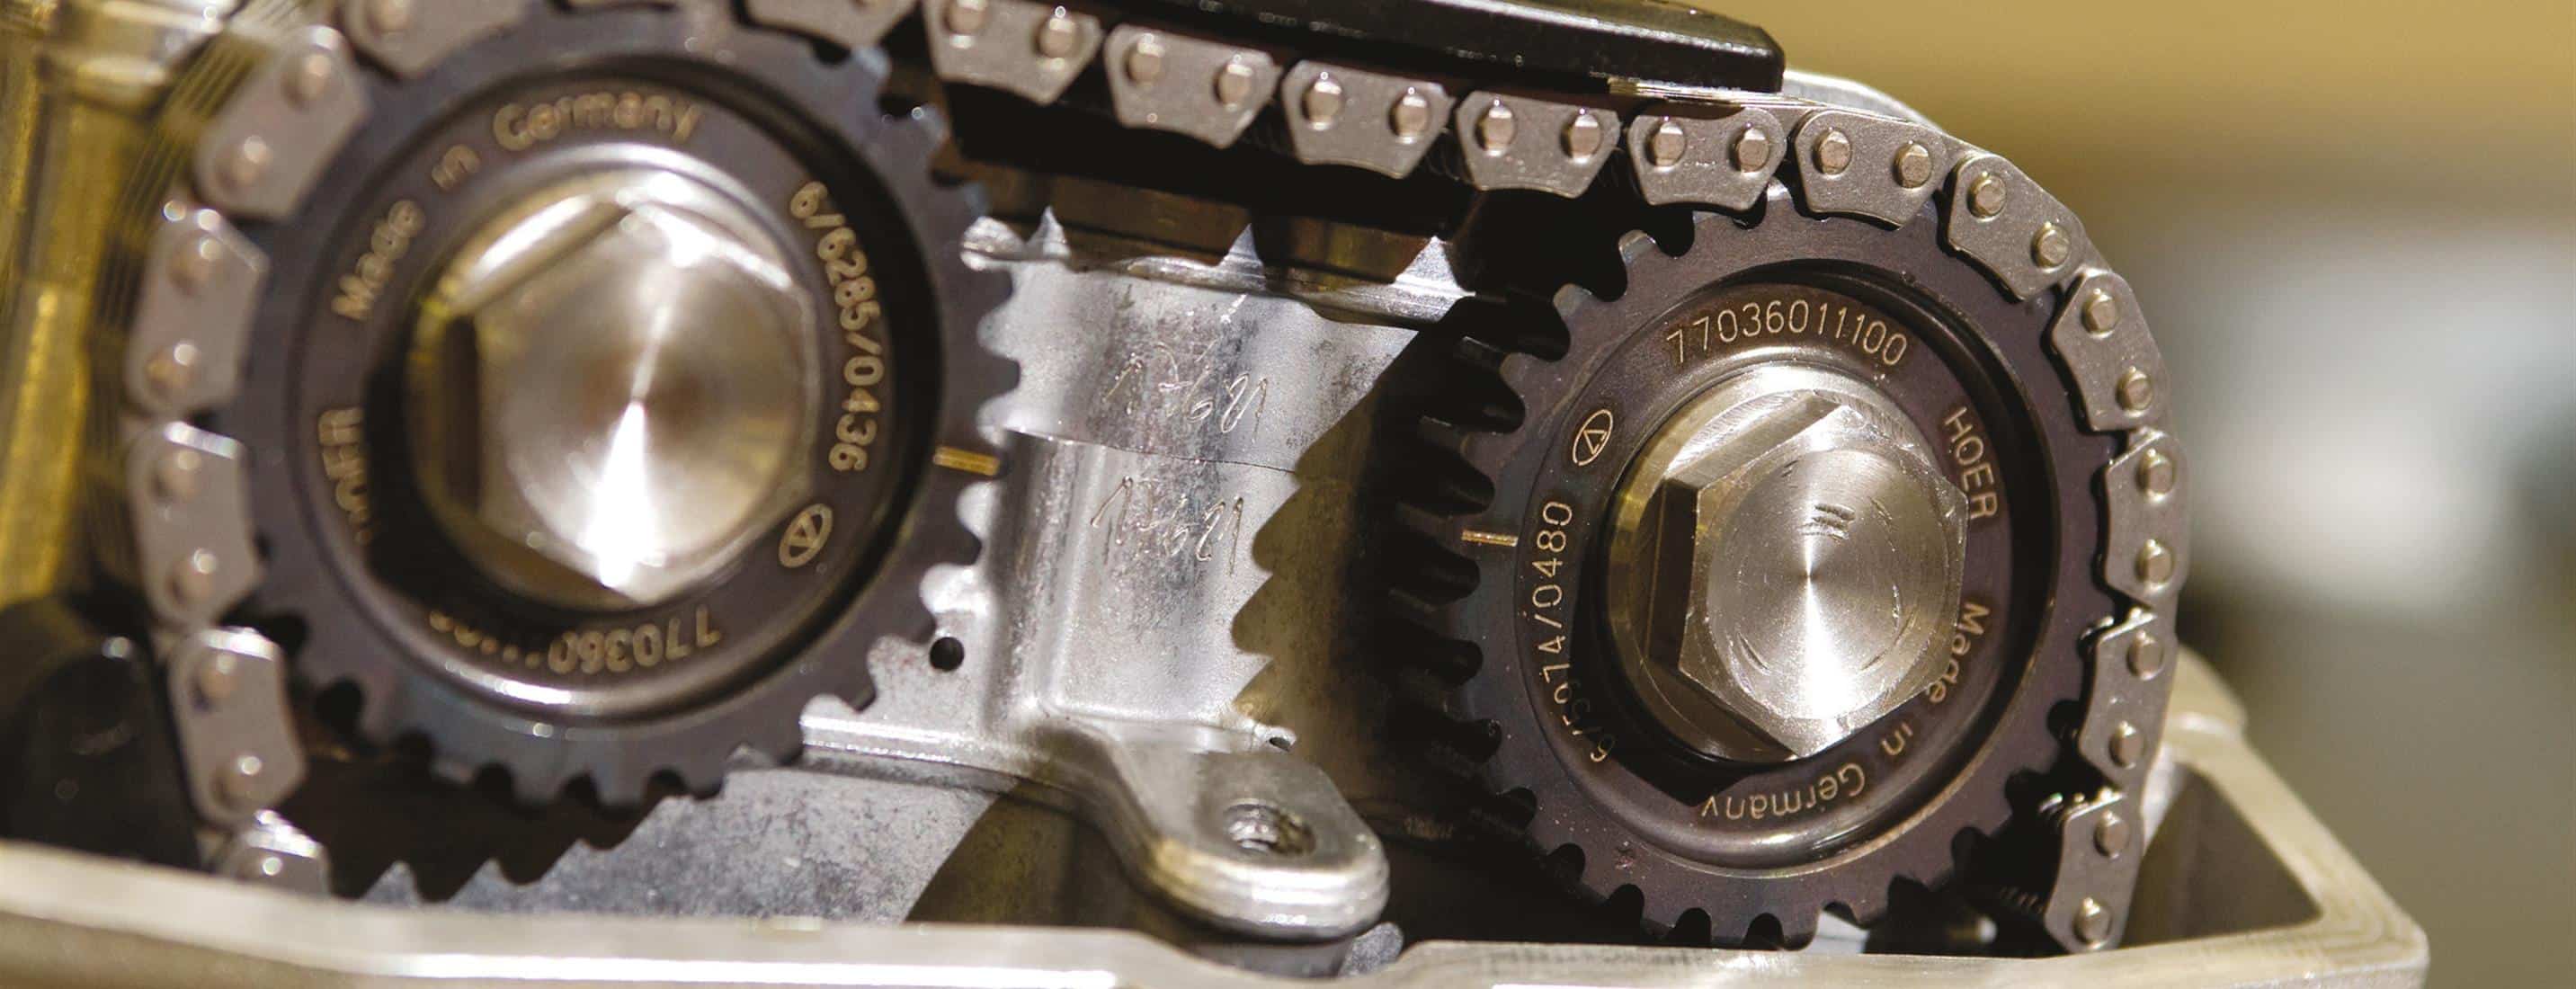
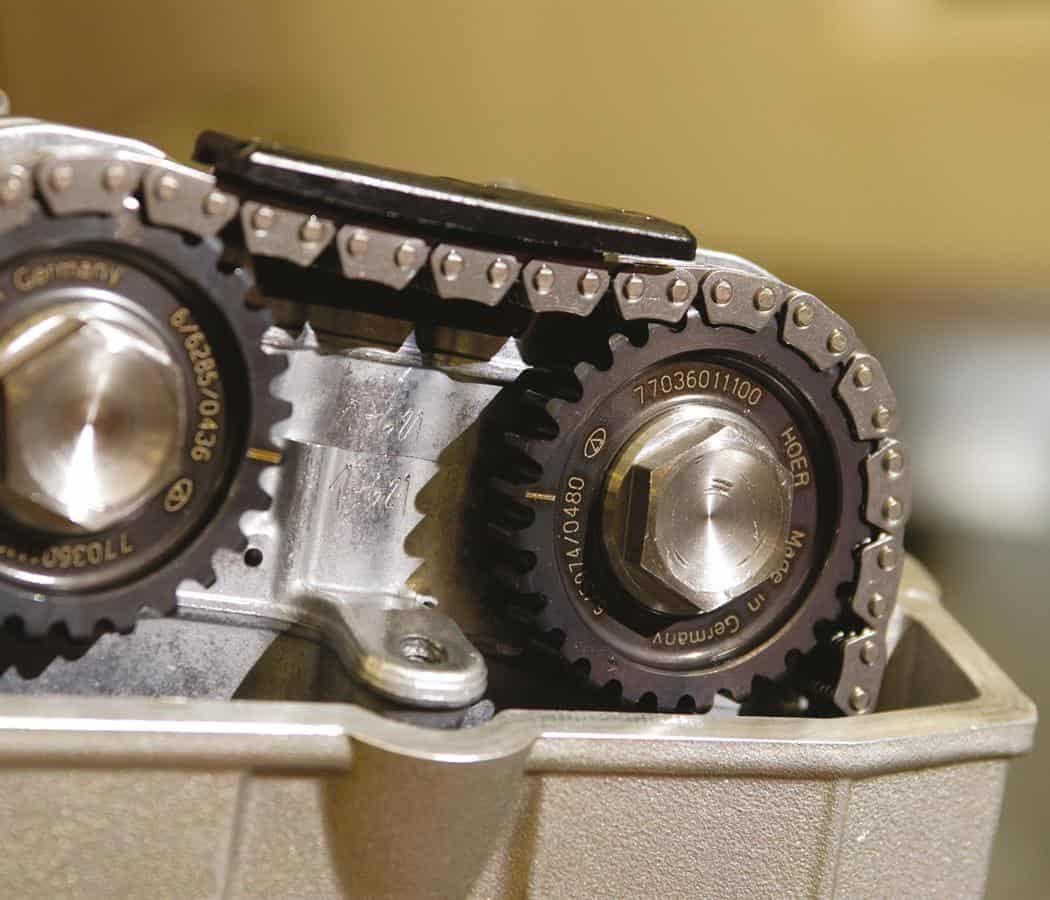
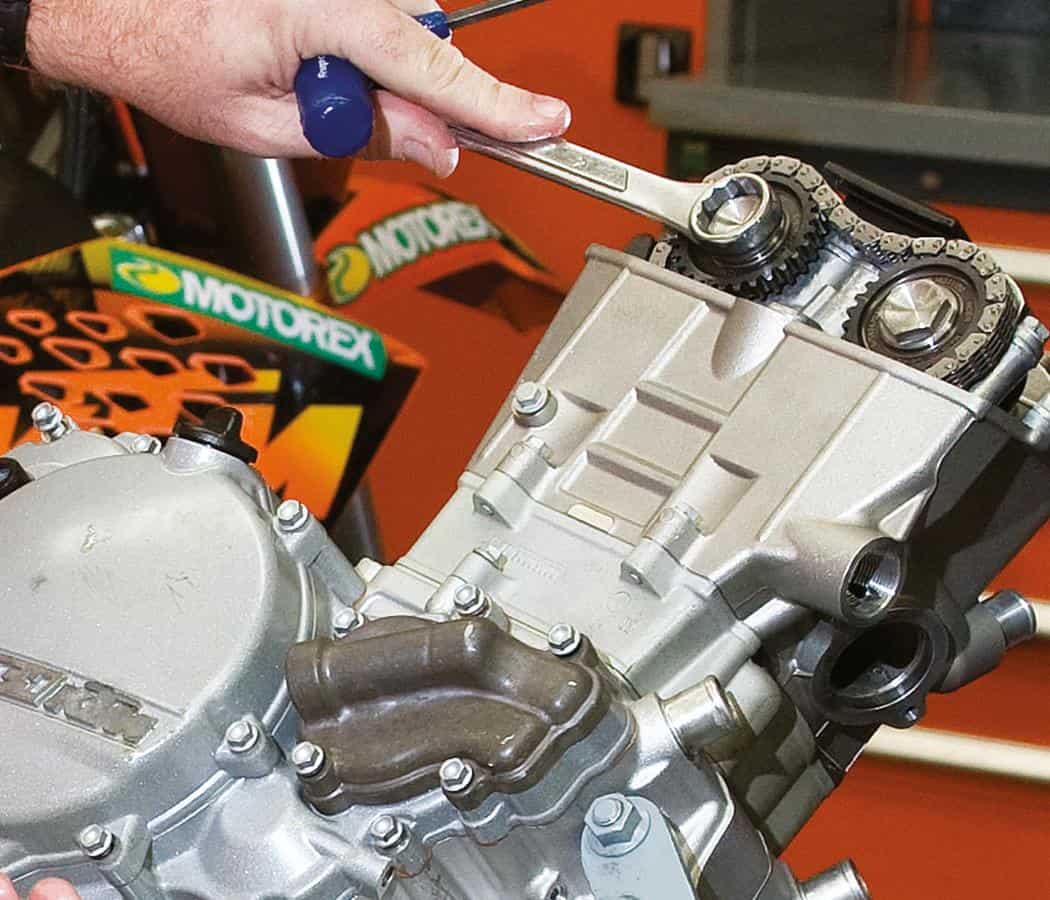
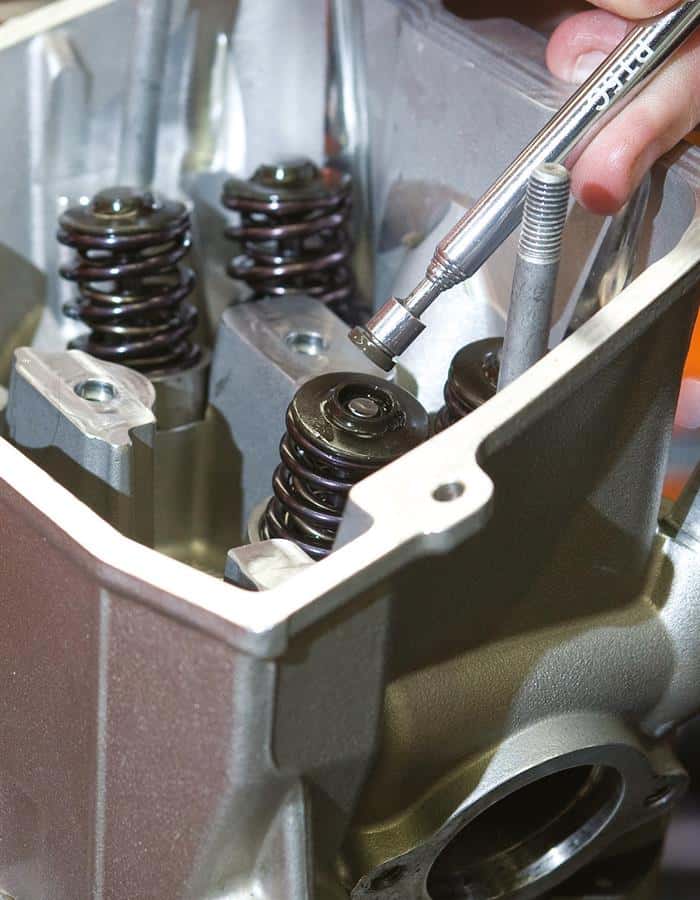
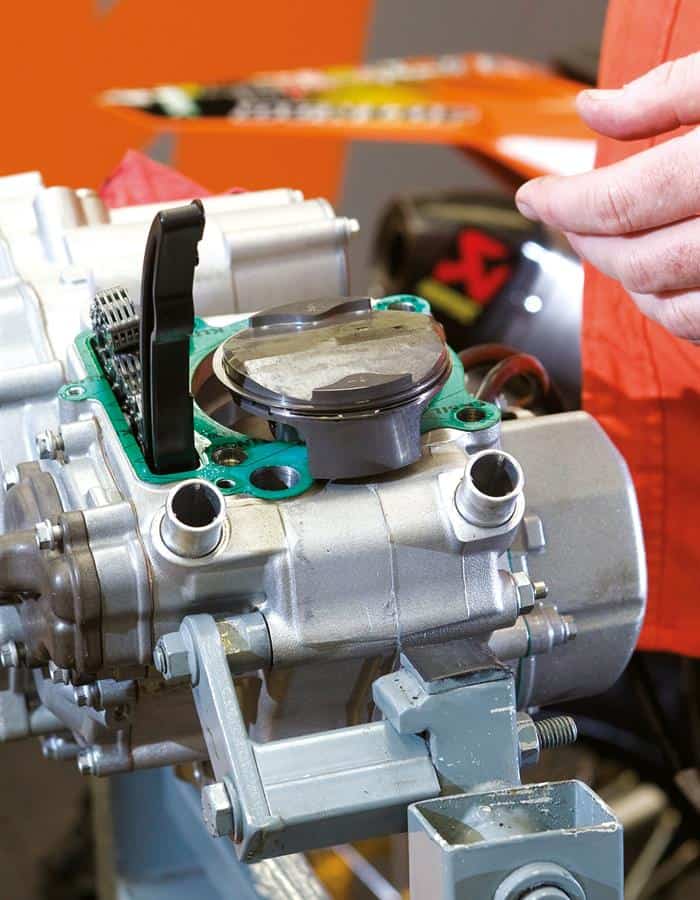
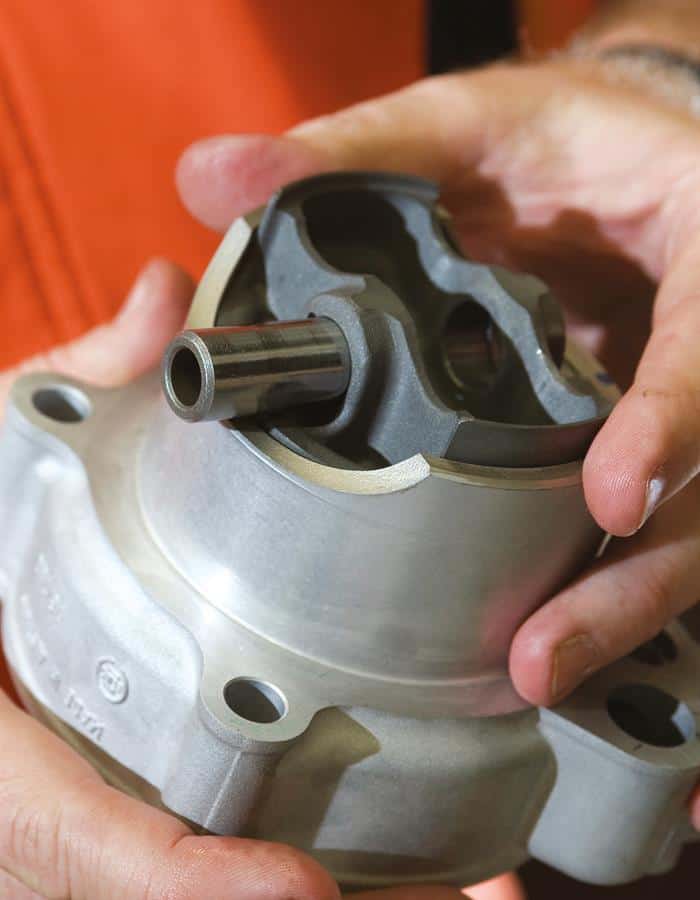
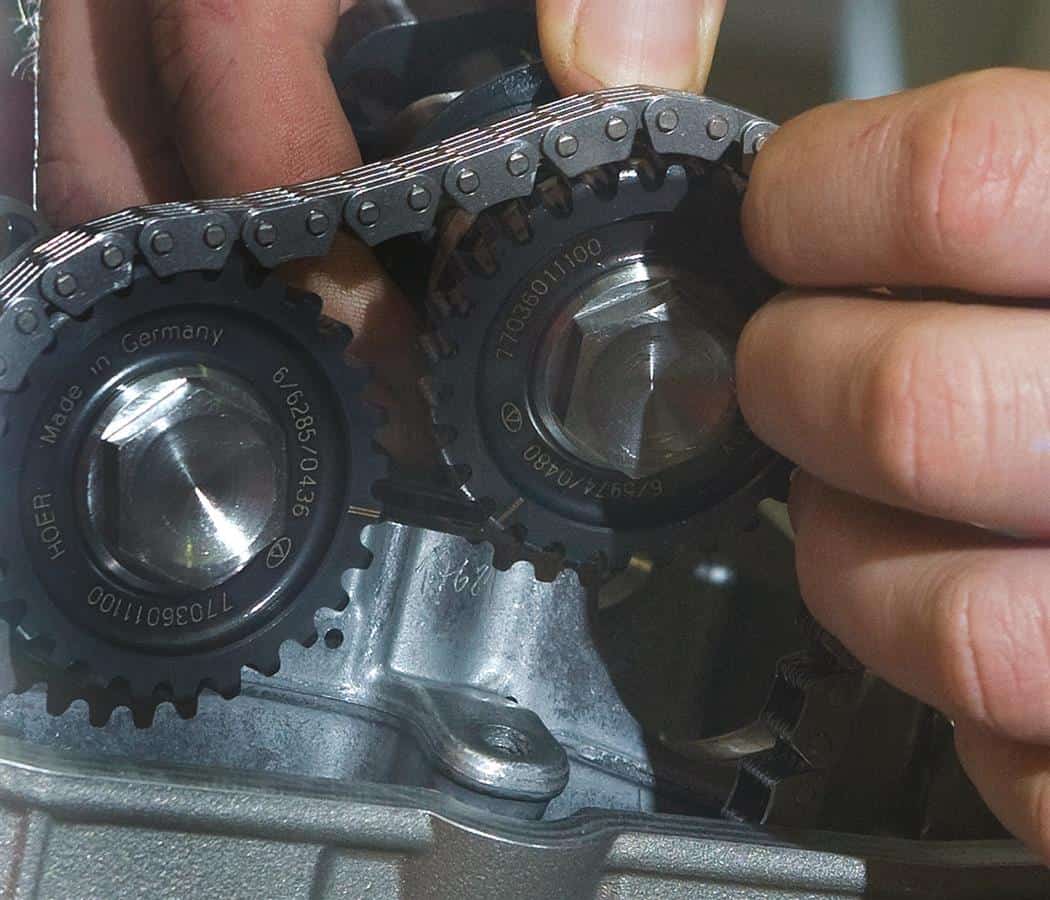
Take a look at the photo (at the beginning of this article) of the cams installed in the head. See those timing marks on the front of the cam gears? Whenever you’re working on an engine, as long as you keep it at top dead centre (on a KTM engine you can physically lock it there), all you need to do is ensure that these timing marks are aligned correctly on reassembly (as pictured) and you quite simply can’t go wrong with cam timing. If you do this, you are ensuring that the position of the cams relative to the crank (and hence the valves relative to the piston) is correct, and that’s all there is to it. Myth busted.
DIY cost vs dealer cost?
It’s worth bearing in mind that there’s some considerable cost savings to be made by doing the work yourself. Costs would of course vary from dealer to dealer, but a main dealer would probably charge you 3-4hrs labour to do a piston and rings in a four-stroke, or about £250, plus parts. To check your valve clearance, a shop will take around half an hour (and charge you about £30), and if they need shimming you’re up for about an hour and a half’s labour (roughly £120) plus shims.
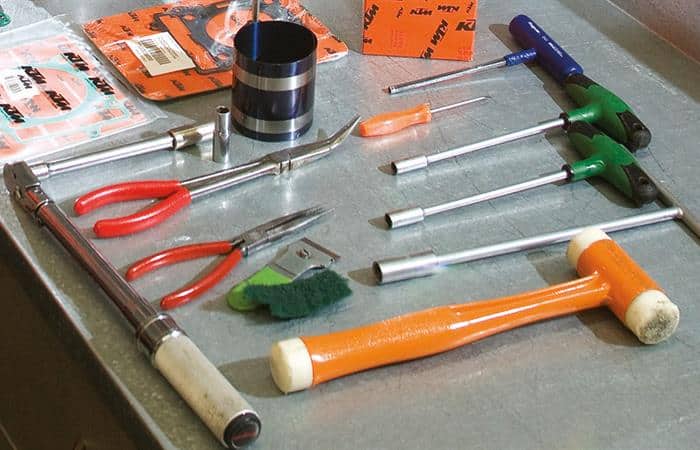
Obviously the cost of the parts remains the same whether you do the work yourself or get the bike shop to do it, so these approximate costings represent money in your skyrocket every time you crack out the spanners yourself. In terms of specialist tools you’ll need a ring compressor (these are available relatively cheaply from any good automotive toolshop), a telescopic magnet for safely retrieving valve shims and other small parts, and some metric feeler gauges for checking and shimming your valves.
How often should you do it?
Of course this depends upon the bike and what type of rider you are. But if you’re a hard rider, racing in a championship then a top-end rebuild should be carried out about every 25hrs, or roughly halfway through a season, assuming you use the same bike for practising on.
Regular racers should be able to go all season long on the same piston and rings, but it’s worth considering a top-end rebuild during the off-season – especially if you’re planning on using the same bike for racing on the following year. If you’re just trail riding, then you can expect to get a good couple of years out of a piston and rings, by which time it would be worth checking the camchain and valves for wear and tear. Valve clearances however should be done much more frequently – every few months or so, depending on use.
1
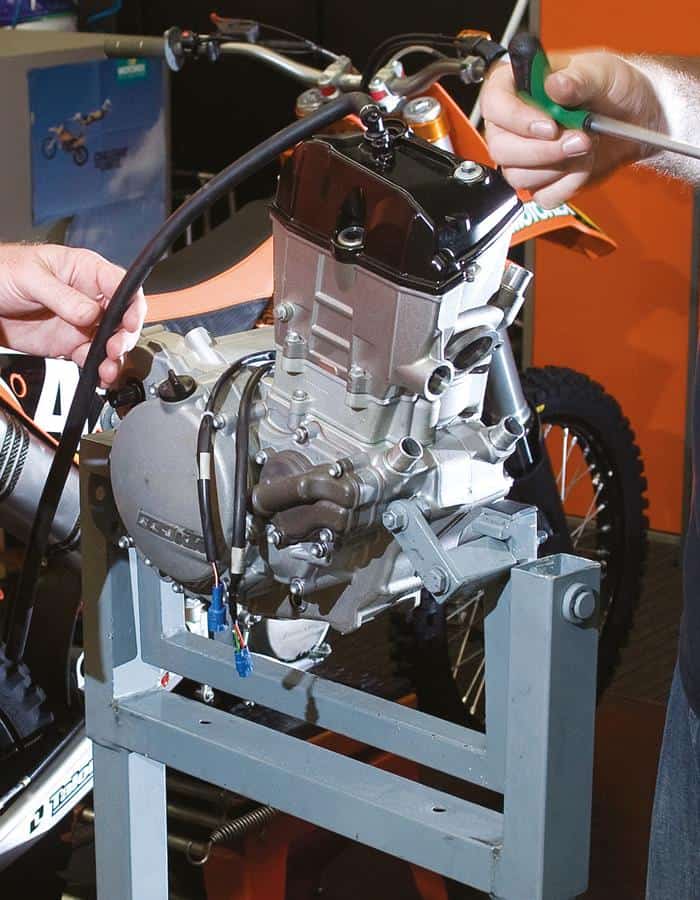
Prepare the engine: Doctor Ross reckons that it’s probably easier to remove the engine from the frame, but in most instances it can be done with it still installed. Either way you’ll have to drain the coolant and the oil and remove all ancillaries including the carb or throttle body, plug and exhaust header. Organise yourself a sizeable area of flat, clean bench space to methodically lay out the parts as you disassemble it, and make sure that your workspace is clean and well lit.
2
Find top dead centre: Okay, before you start the disassembly process ensure that the engine is at TDC. On most Jap bikes this will mean removing an inspection cover on the case and turning the engine over while visually checking for a timing mark, whereas on a KTM you can physically lock it at TDC by removing a washer from a bolt in the case and replacing the bolt once the engine is on TDC – the manual shows you which one.
3
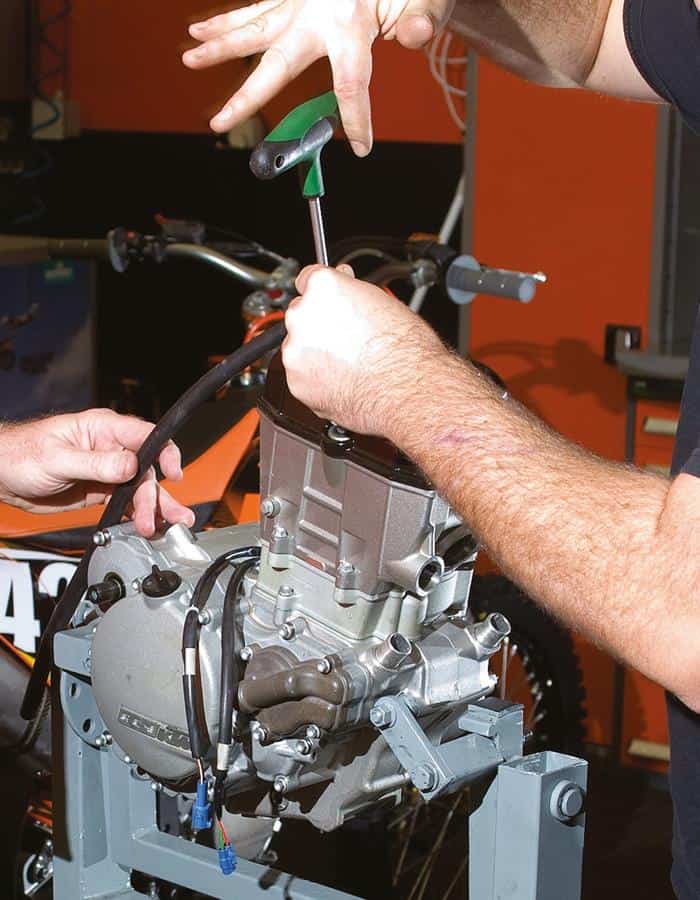
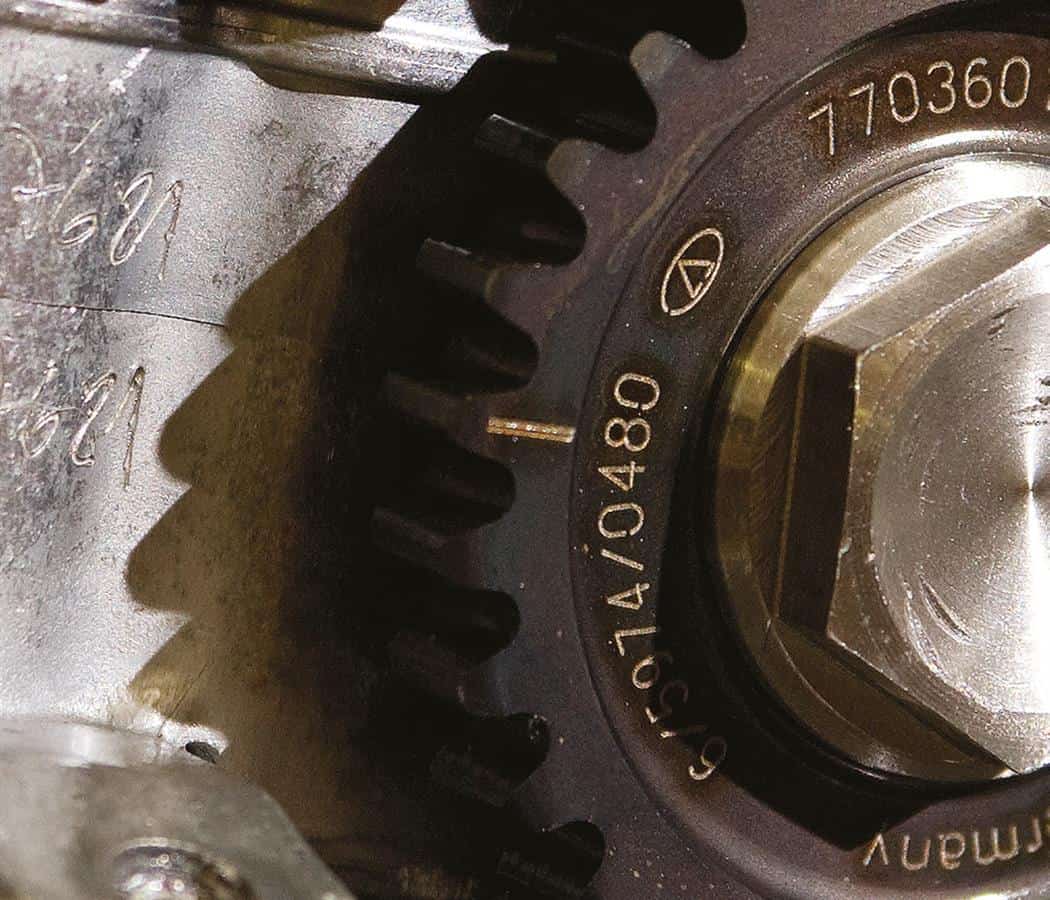
Remove the cambox cover: Using a T-bar, undo the bolts of the tappet cover and lift it off. Then take the time to familiarise yourself with how everything looks, and the angle of the camshaft lobes. A good tip is to grab your digital camera and pop off a few pics. This will help when reassembling the top end. Also check that the timing marks are correctly aligned with the mark on the bridge as shown. If they’re not, your engine is not at TDC!
4
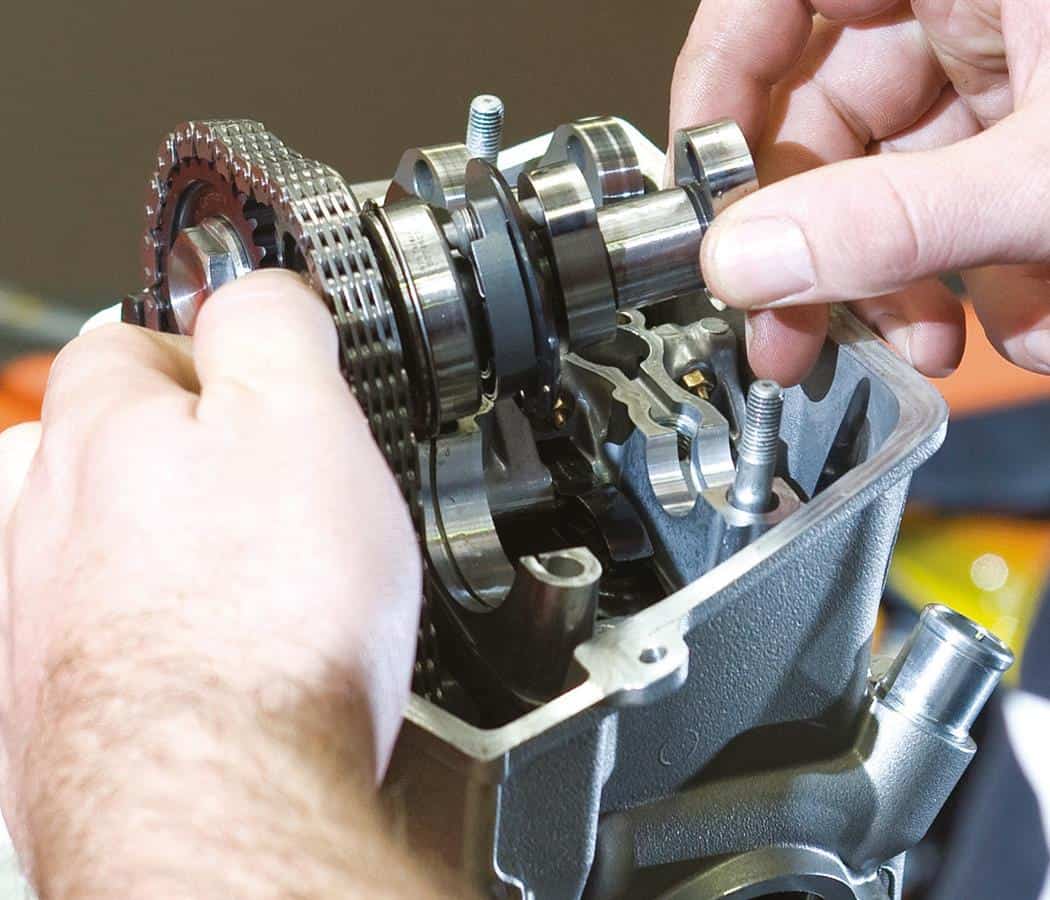
Remove the cams: To do this you must first remove the cam chain tensioner to give sufficient slack on the chain to remove it from the cam gears – refer to your bike’s manual for details of your particular model. Once you’ve done that then undo the bolts holding down the bridge (the bit which secures and carries the cams), remove the top half and lift the cams out, then remove the bottom part. Watch out for metal dowels! If they disappear it means a trip to the bike shop, and if they fall into the engine it’s VERY bad news. It’s best to remove them with pointy nose pliers and place them in order of disassembly on the bench. Once again pop off a couple of pics with the digi to make reassembly easier.
5
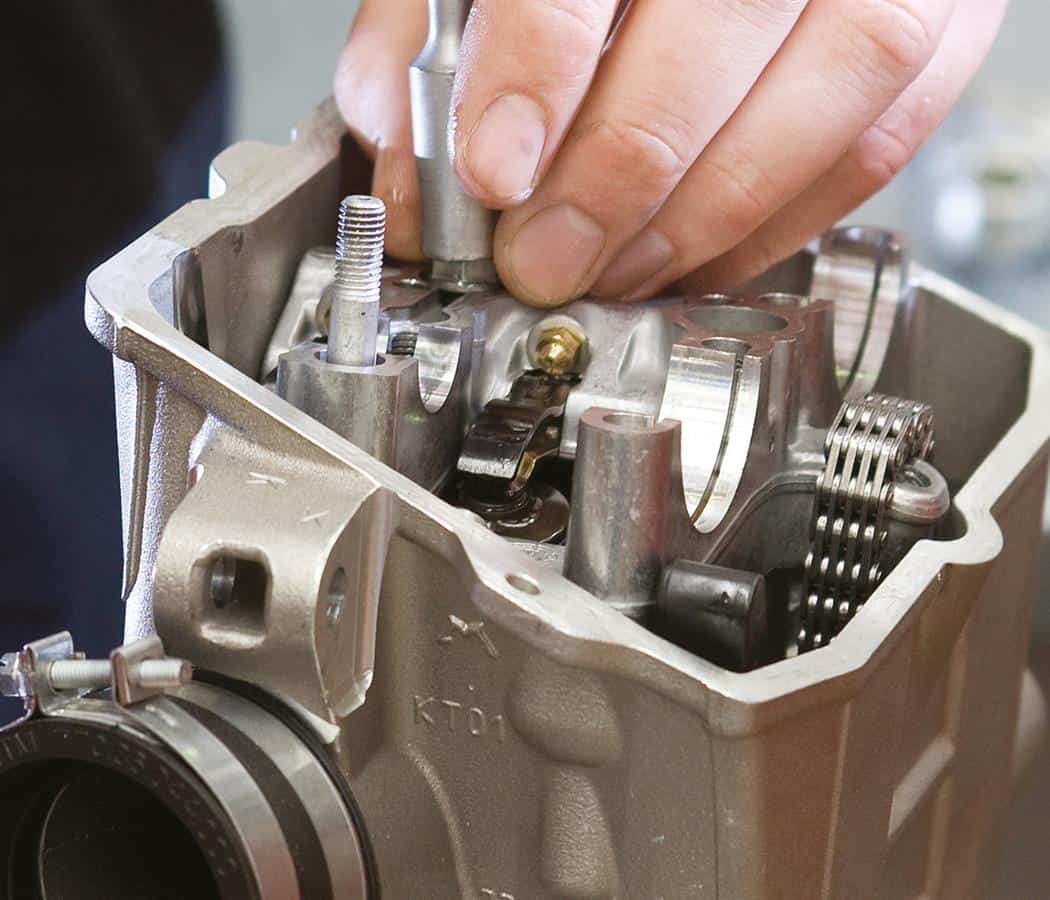
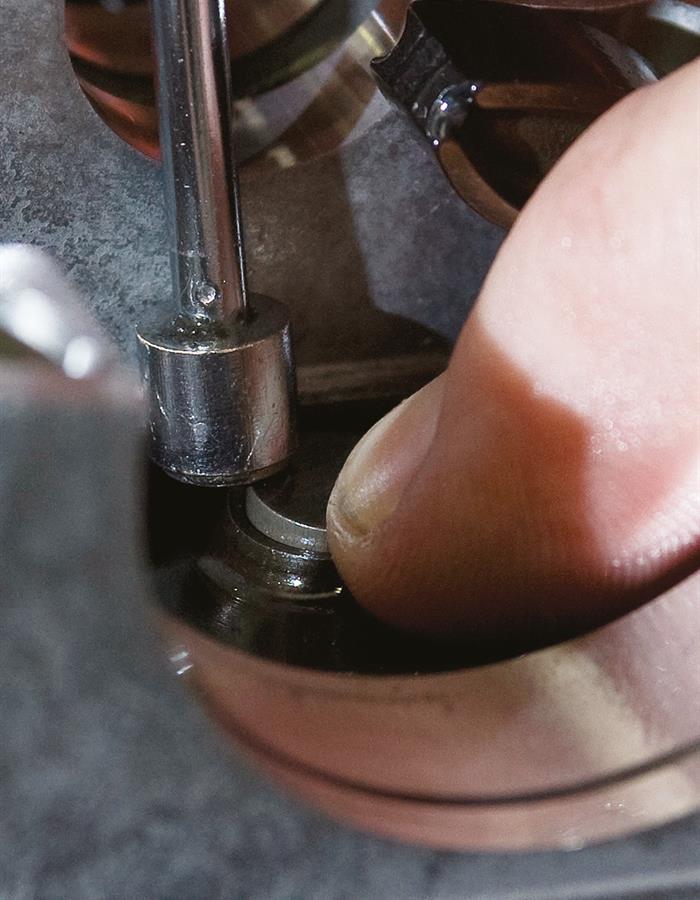
Remove the shims: There’s nothing holding your shims in place except good old fashioned gravity. Grab a telescopic magnet and remove them before they remove themselves, placing them on the bench on a sheet of paper with a drawing of a cross showing exhaust and intake viewed from the top. Place the shims down on the corresponding spot on the diagram.
6
Remove the head: Undo the head bolts and carefully lift the head off the barrel. Lay the head on the bench on its side to avoid damaging the gasket face. Again, remove the dowels straight away and lay them out so that they don’t fall out and you know where they are.
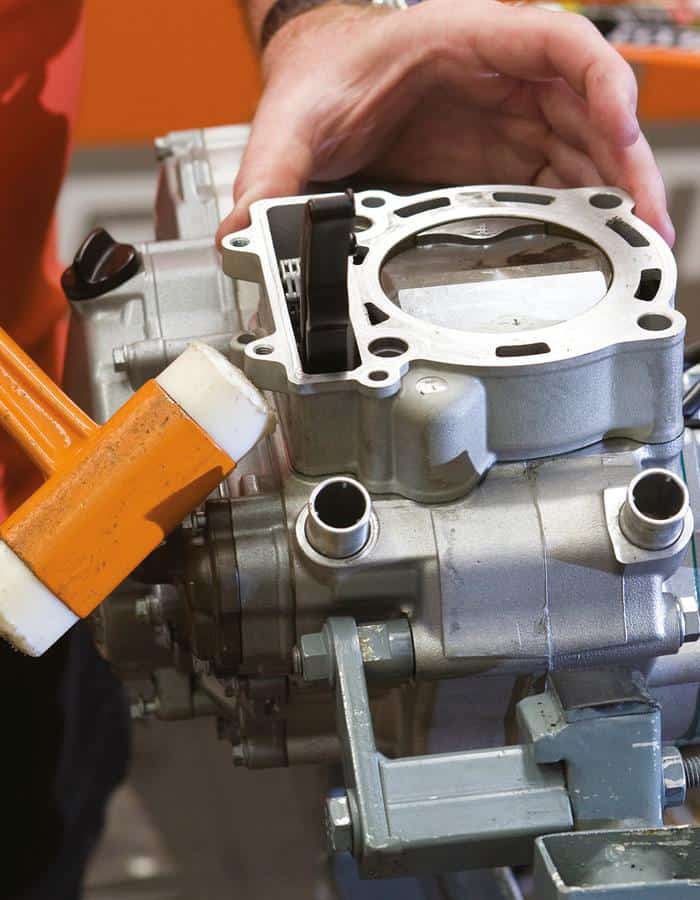
7
Remove the cylinder: Pretty much all the brands are the same in that they’ve got dowels to locate the barrel and just one bolt to stop it moving around during assembly. Remove that bolt and the cylinder will lift off, sometimes you need to give it a light tap with a plastic mallet to get it to shift off the dowels. Turn it upside down, remove the dowels and lay everything out.
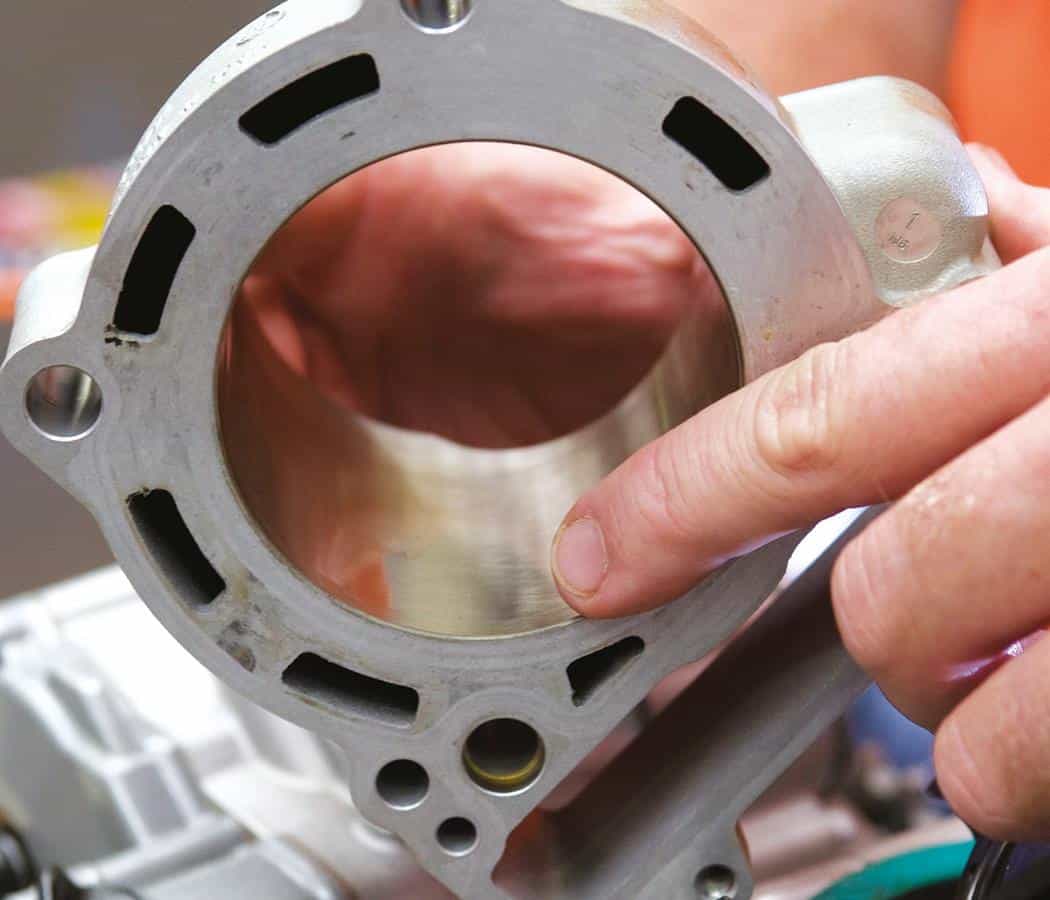
8
Check the bore: Take a look inside the barrel and check its condition. Look for any score marks on the bore, the general rule of thumb is that if you can’t feel them with your fingernail, they’re okay. Same goes for the lip at the top of the bore where the rings reach the top of their travel.
9
Change the rings: If you’re just replacing rings you don’t need to disassemble the engine any further, just change the rings with the piston still on the conrod and skip step 10.
10
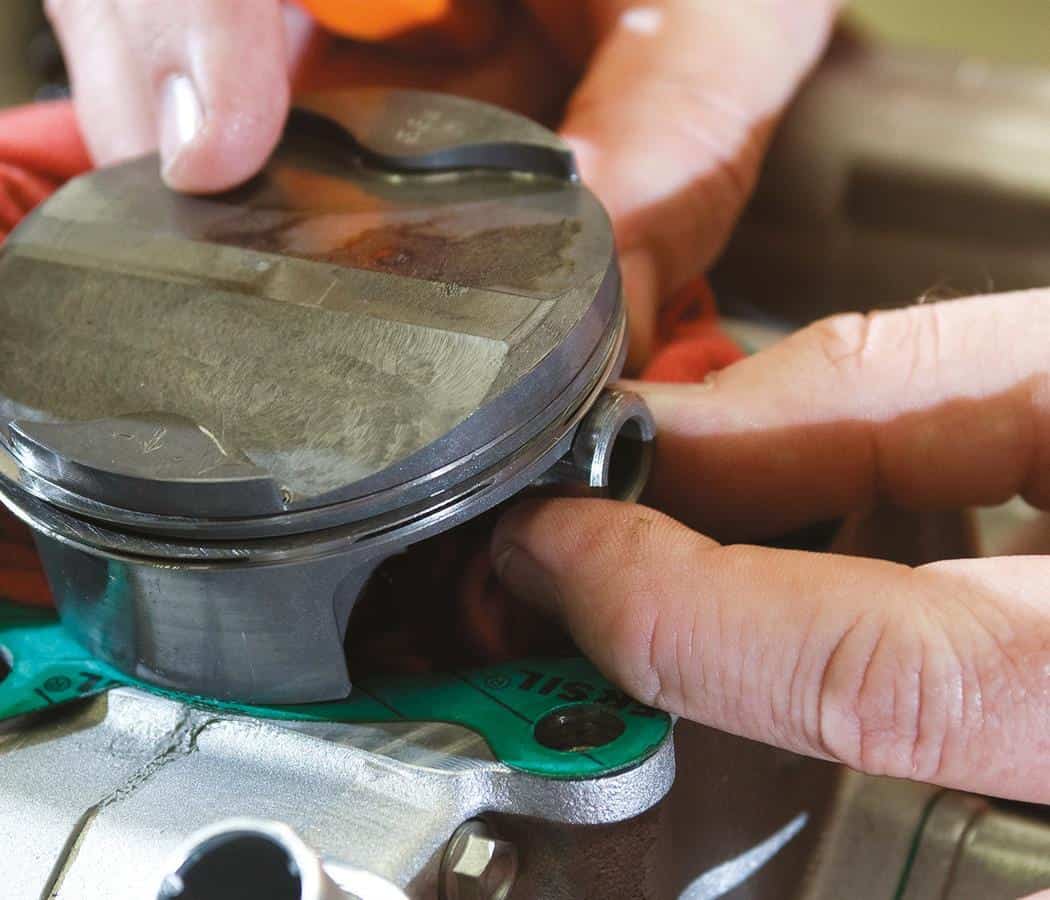
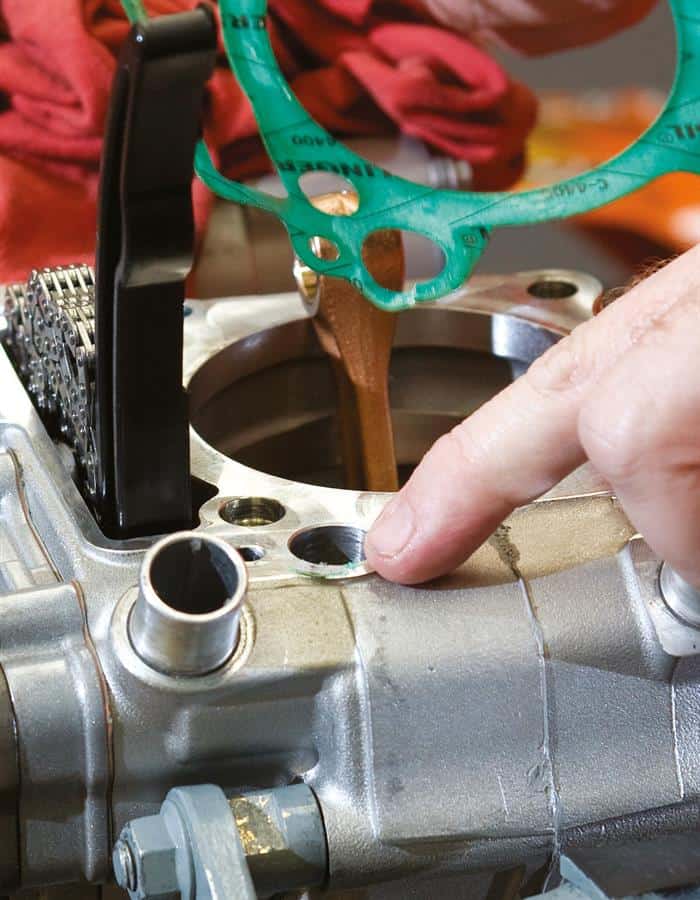
Remove the piston: You need to first remove the gudgeon pin circlip, and be very mindful of not dropping it into the case. So get a clean rag and cover the hole in the top of the case, so if it falls while you’re removing it you’re safe. Place your finger over the circlip (to stop it flying across the room and landing in your beer) and lever it out. It’s not recommend that you reuse the circlip. Slide out the gudgeon pin and remove the piston.
11
Back together again: That’s the end of disassembly, so it’s time to prepare for reassembly. Remove the base gasket carefully and scrape off any leftover gasket material with a razor blade, before cleaning it up with some Scotchbrite and contact cleaner. Keep your rag in place to catch any gasket material that might fall into the engine, the object is a nice, clean, dry gasket surface. You need to do the same thing on the barrel and the head, and you can also give the bore a clean with Scotchbrite if there are any carbon deposits.
12
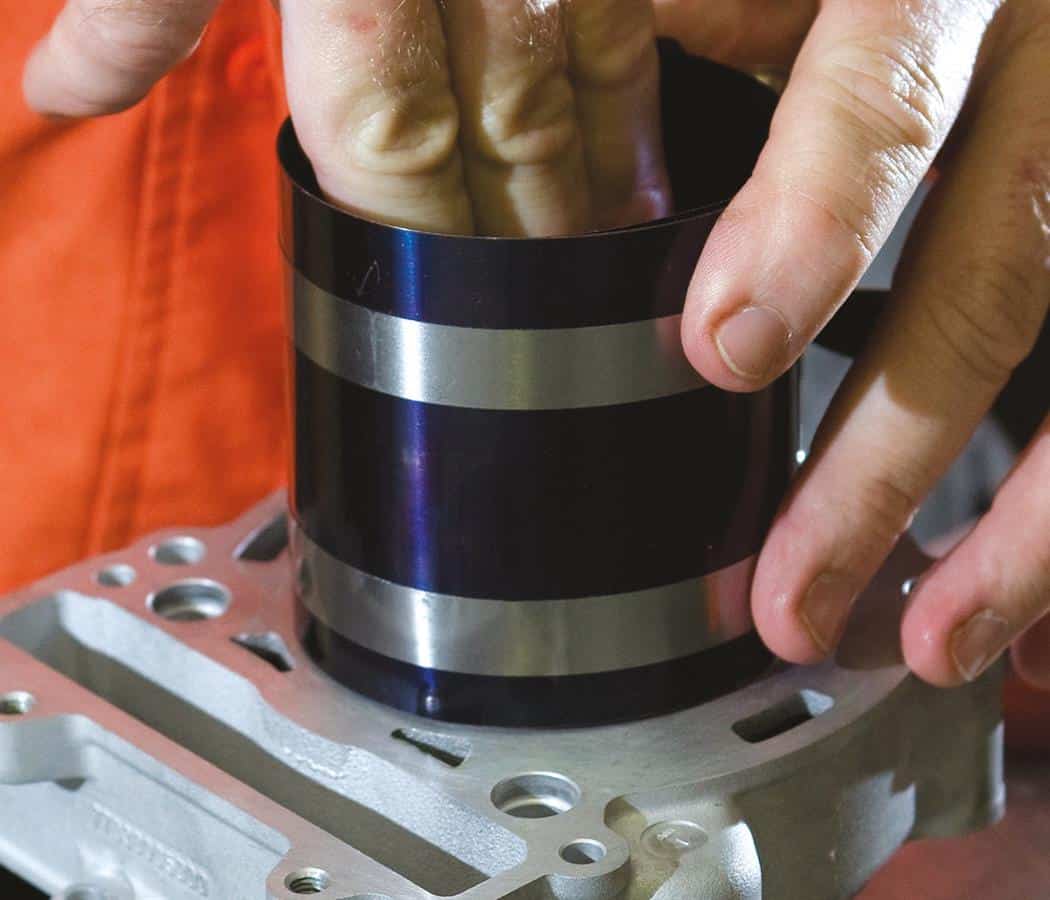
Install the piston: KTM pistons come with the rings already fitted, but others will require that you fit them. Place them on top of the piston and gently ease them open so that they slip over the piston and drop into the correct gap with the locating pin in the right place. The most important thing when fitting a piston is to ensure that the arrow is facing forwards. A ring compressor is helpful for installing the piston – they’re cheap and readily available at good toolshops.
Make sure that the end gaps on the rings aren’t aligned with each other, then tighten the ring compressor around the piston so that the rings are compressed but the piston can still slide up and down, then place it on top of the barrel. Before you install the piston, oil the bore slightly and again check to ensure that the arrow is pointed towards the front, then apply some pressure to the top of the piston so that it pops into the barrel.
13
Fit the piston to the conrod: Slide the piston far enough down the barrel so that you get access to the gudgeon pin, but not so far that the rings pop out the bottom. You can fit one of the circlips into the piston, then place it on the conrod and push the pin through and it will clip into place, before installing the second circlip. There is a special circlip installation tool which makes the job easier but you can do without it. Get a good pair of pointy nose pliers and grip the circlip, sit it in the groove and work it into position. It’s not as easy as it looks and patience is a virtue with this job! Make sure all the dowels are in place then tighten the bolt that secures the cylinder. Always use a new gasket.
14
Refit the cylinder head: Lay down a fresh head gasket, refit the dowels and then carefully place the head on top of the cylinder. Do the head bolts up finger tight, then torque them down in stages in an X-pattern (with a torque wrench), according to manufacturer specifications. For this engine its 30Nm and then 50Nm.
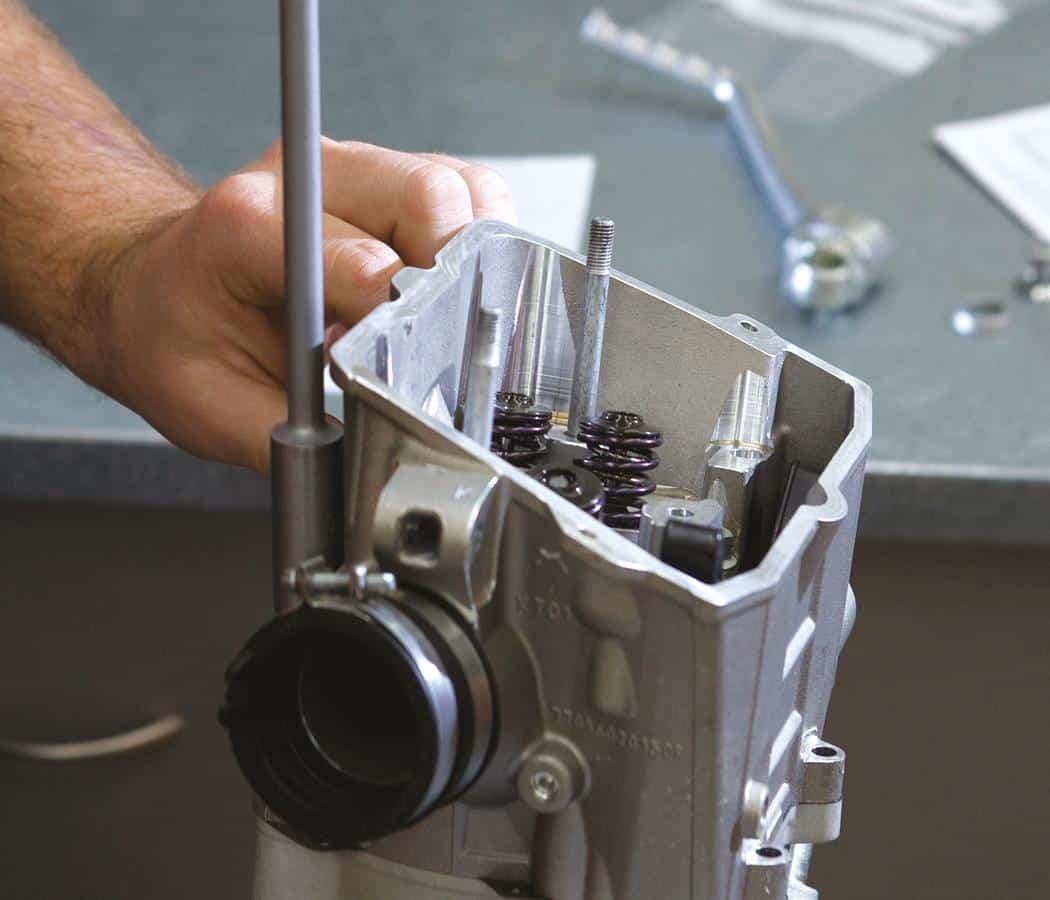
15
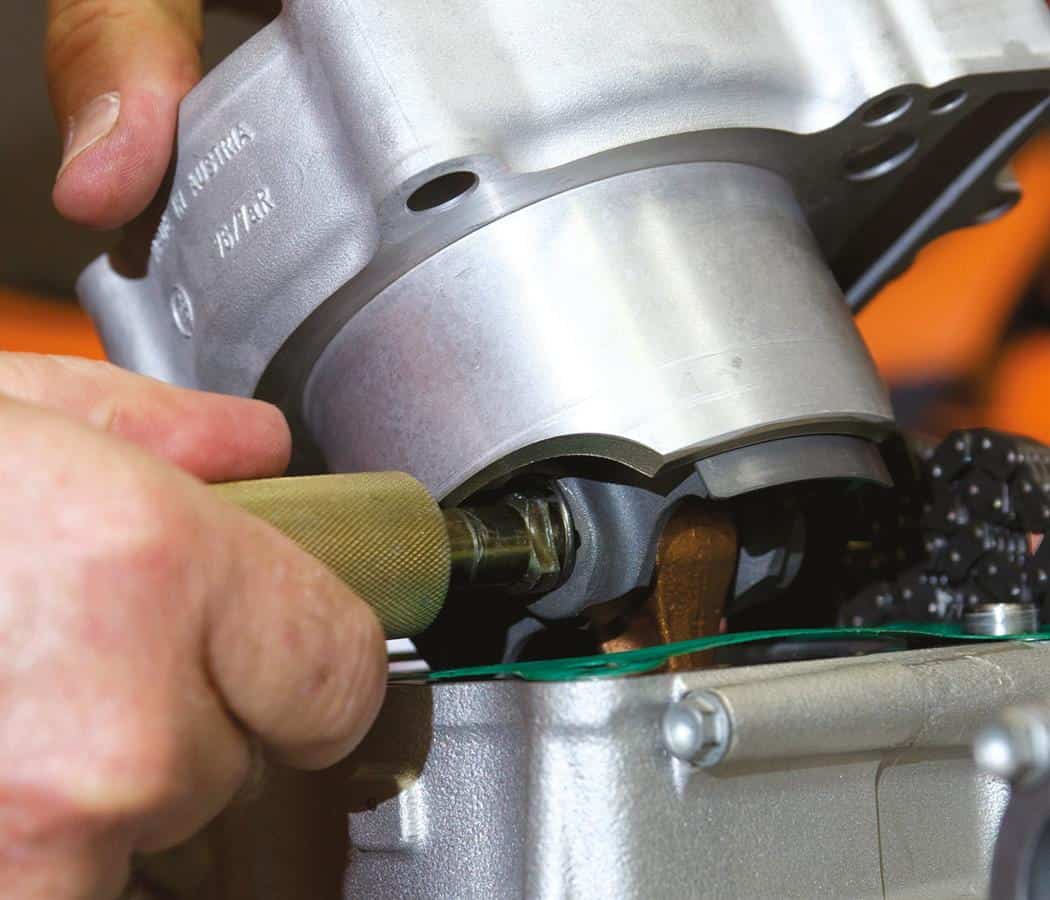
Refit the bridge: Lift the camchain up and hold it in place with a screwdriver (or as shown). Again, remember to refit the dowels, then install the bridge down onto the dowels and seat it correctly, and torque it down according to manufacturer supplied specs.

18
Reinstall the bridge cap: Fit it in place and again consult your handbook for the correct torque settings and creep up on them in an X-pattern with a torque wrench.
19
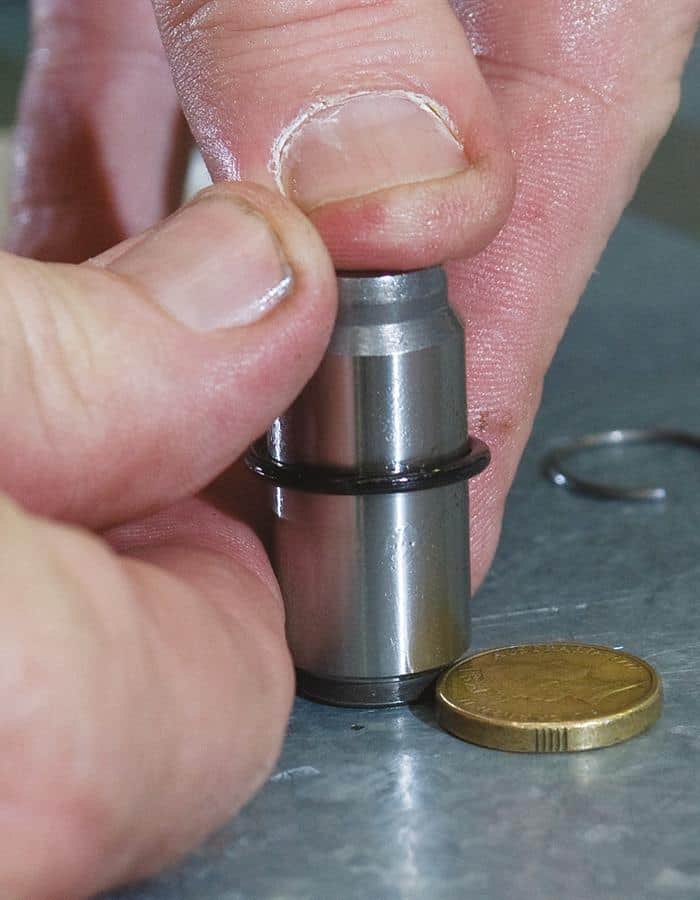
Reinstall the camchain tensioner: Current model KTMs like this one have a hydraulic camchain tensioner, so you have to reset it before installing it. The trick is to use a coin or similar object on the lip of the tensioner to set it correctly, then reinstall it on the engine just as you removed it.
20
Check your timing: On a Japanese bike you need to double check that the engine is still on TDC once the cam chain has been tensioned, and then check your timing marks. If all that is in order, your cam timing is definitely correct. If you are working on a KTM, remove the TDC locking bolt and refit the washer to allow the engine to spin freely again. Refit the tappet cover. Put the tappet cover back in place and torque up the bolts.
Your engine is now back together, so take some time out to congratulate yourself. Now it’s time to refit the engine, the carb, exhaust header and all other associated wiring, radiator hoses and other equipment. Fill the engine with oil and the radiators with coolant. It’s important to start the engine and not rev it, especially if it has a hydraulic cam chain tensioner. Don’t blip the throttle for about 30 seconds, listen to it and check for oil and water leaks. If all has gone well, your work is done!
Valve Clearances
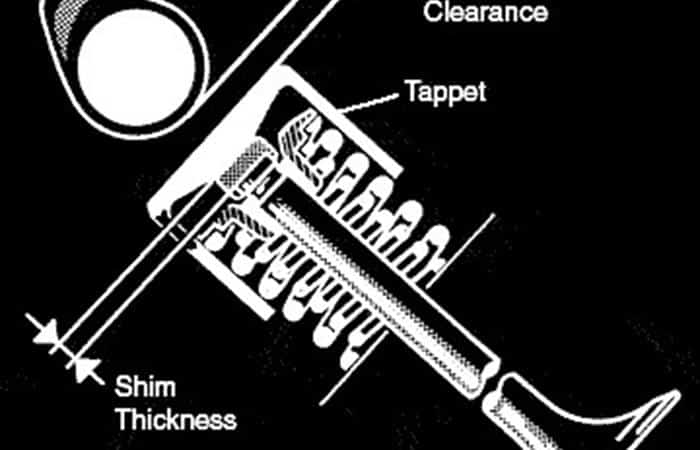
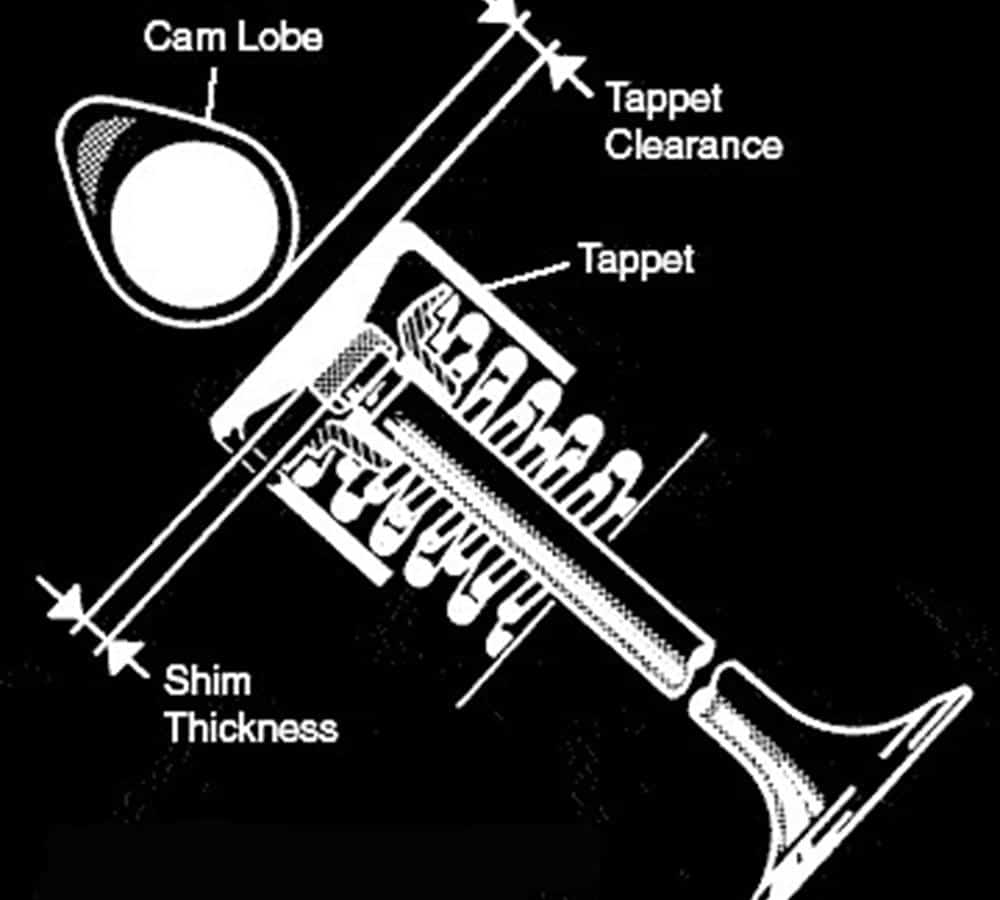
Unless you’re lucky and have a bike with locknut-style screw adjusters, then most likely you’re going to be dealing with shims. These shims are what you replace when adjusting your bike’s valve clearances. The valve itself sits in the seat, pulled in by the pressure from the valve spring as it operates. The valve slowly wears into the seat and pulls through, which closes up the clearance. When that happens you need to fit a thinner shim to get that clearance back.
When your engine won’t start and is lacking compression, it’s normally because the inlet valves have worn into the seat because all the clearance has been take up. At that time there’s pressure from the cam or the rocker arm on the valve which holds it open. It only needs to be open a touch and you’ll lose compression.
To do the shims you don’t need to take the bridge off but you may still need to take the cams out. Checking your clearances is a simple matter of measuring the gaps between the shims and the rockers with a feeler gauge with the piston at TDC. If they’re within spec, you’re laughing. If they’re not, you need to measure how far out they are and the height of the shims you currently have in place. Do the maths to figure out what size shims you need to get your clearances back within spec, order them from the bike shop, replace them, recheck them, and you’re away. We’re talking very fine measurements here, so take your time and make sure you recheck it once you’ve fitted your new shims.