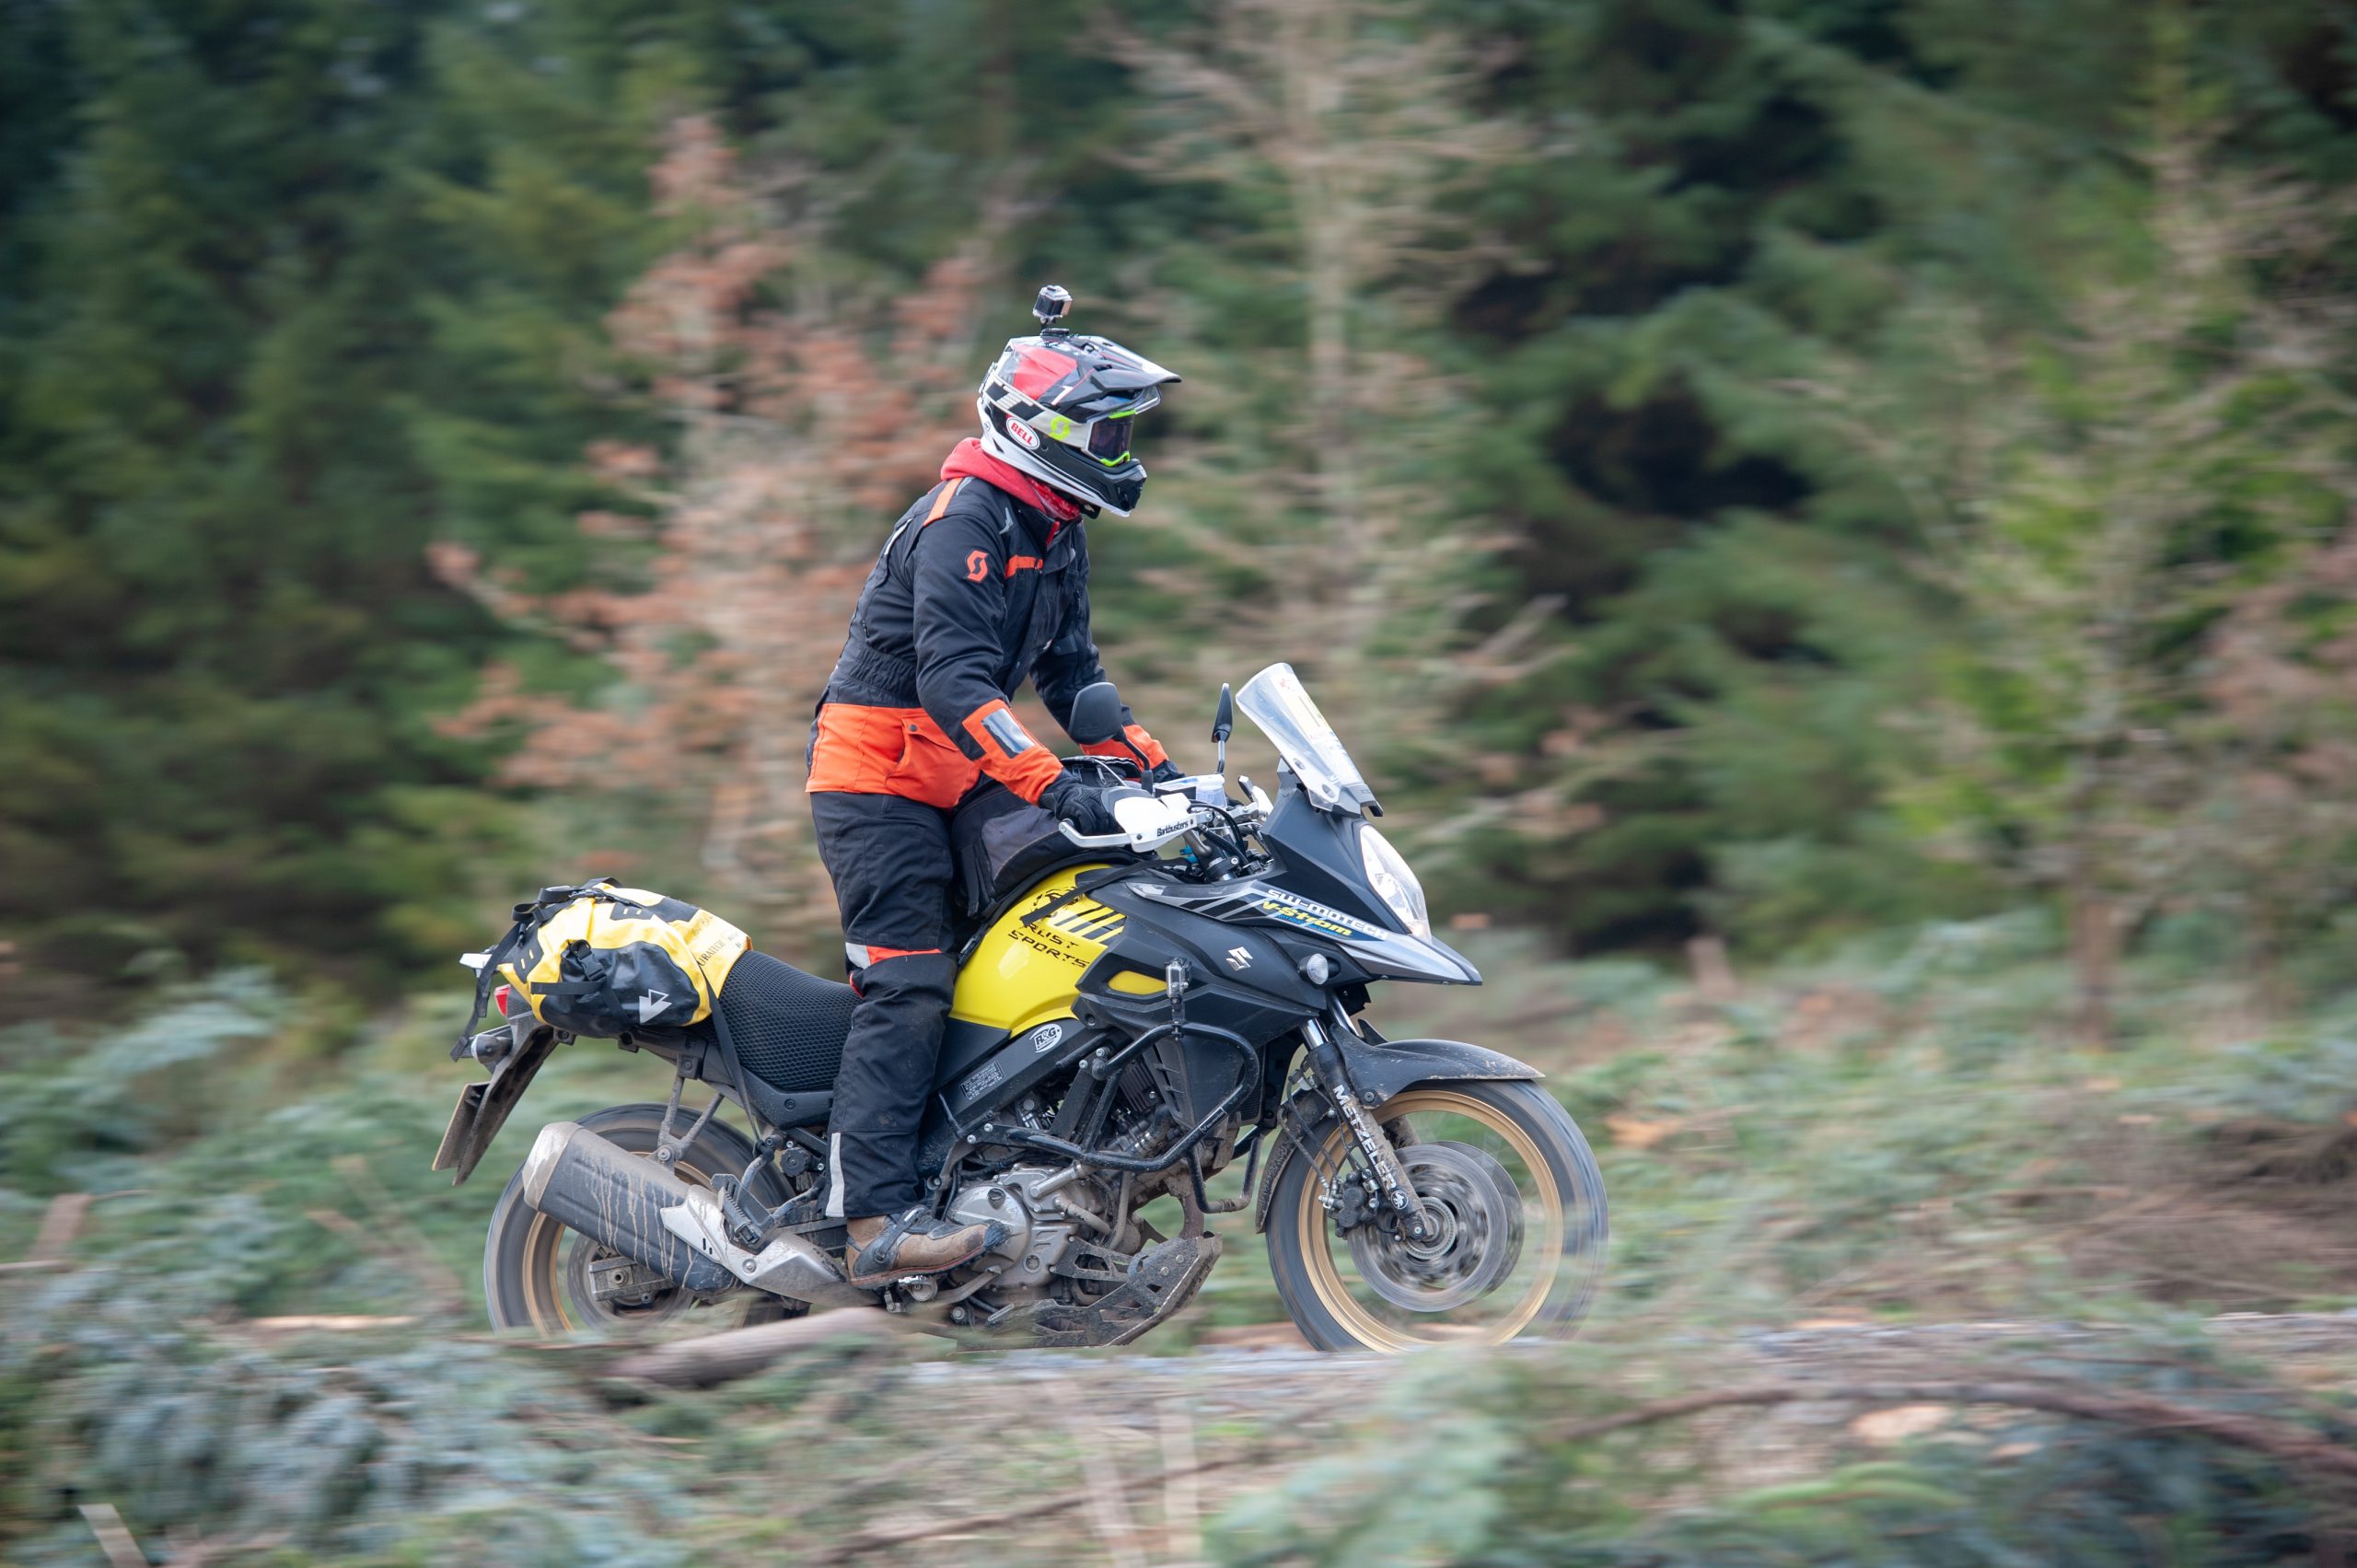
Yep, back in 2018 we had big plans to ride the Adventure section of that year’s Rallye du Maroc. Heck, we even planned to ride there and back. Only the Adventure section was canned just a few weeks before the start so it never happened.
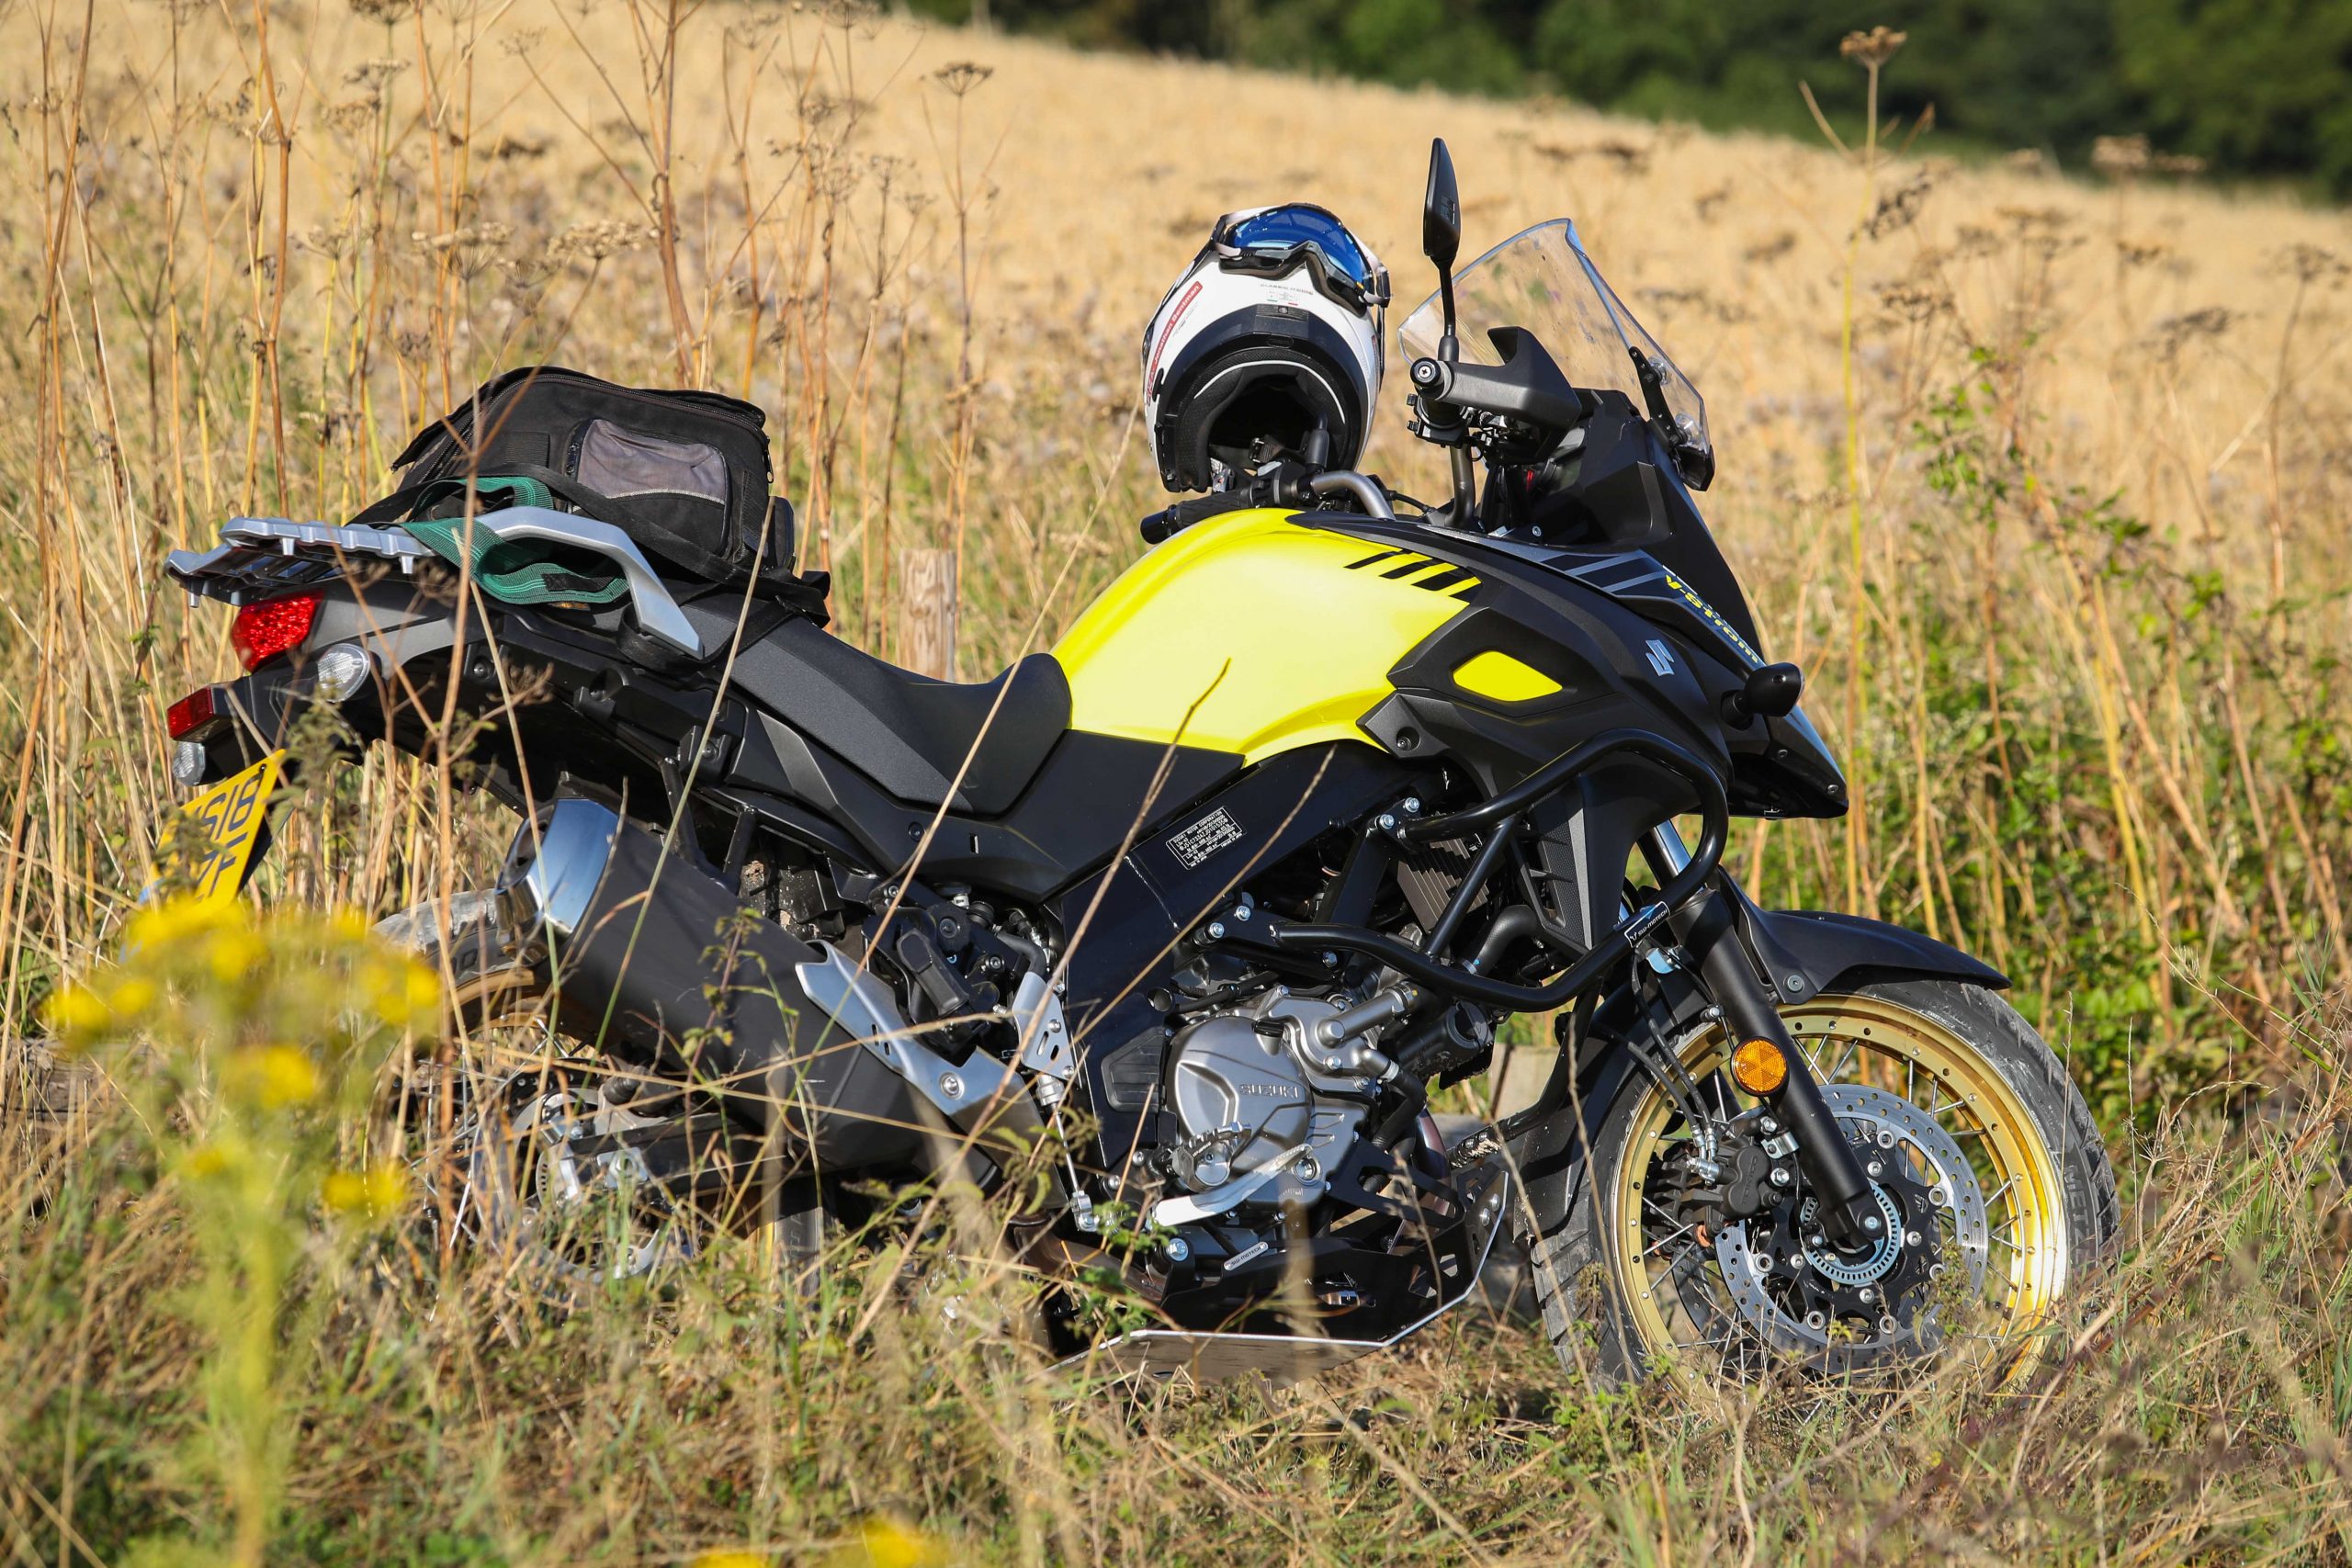
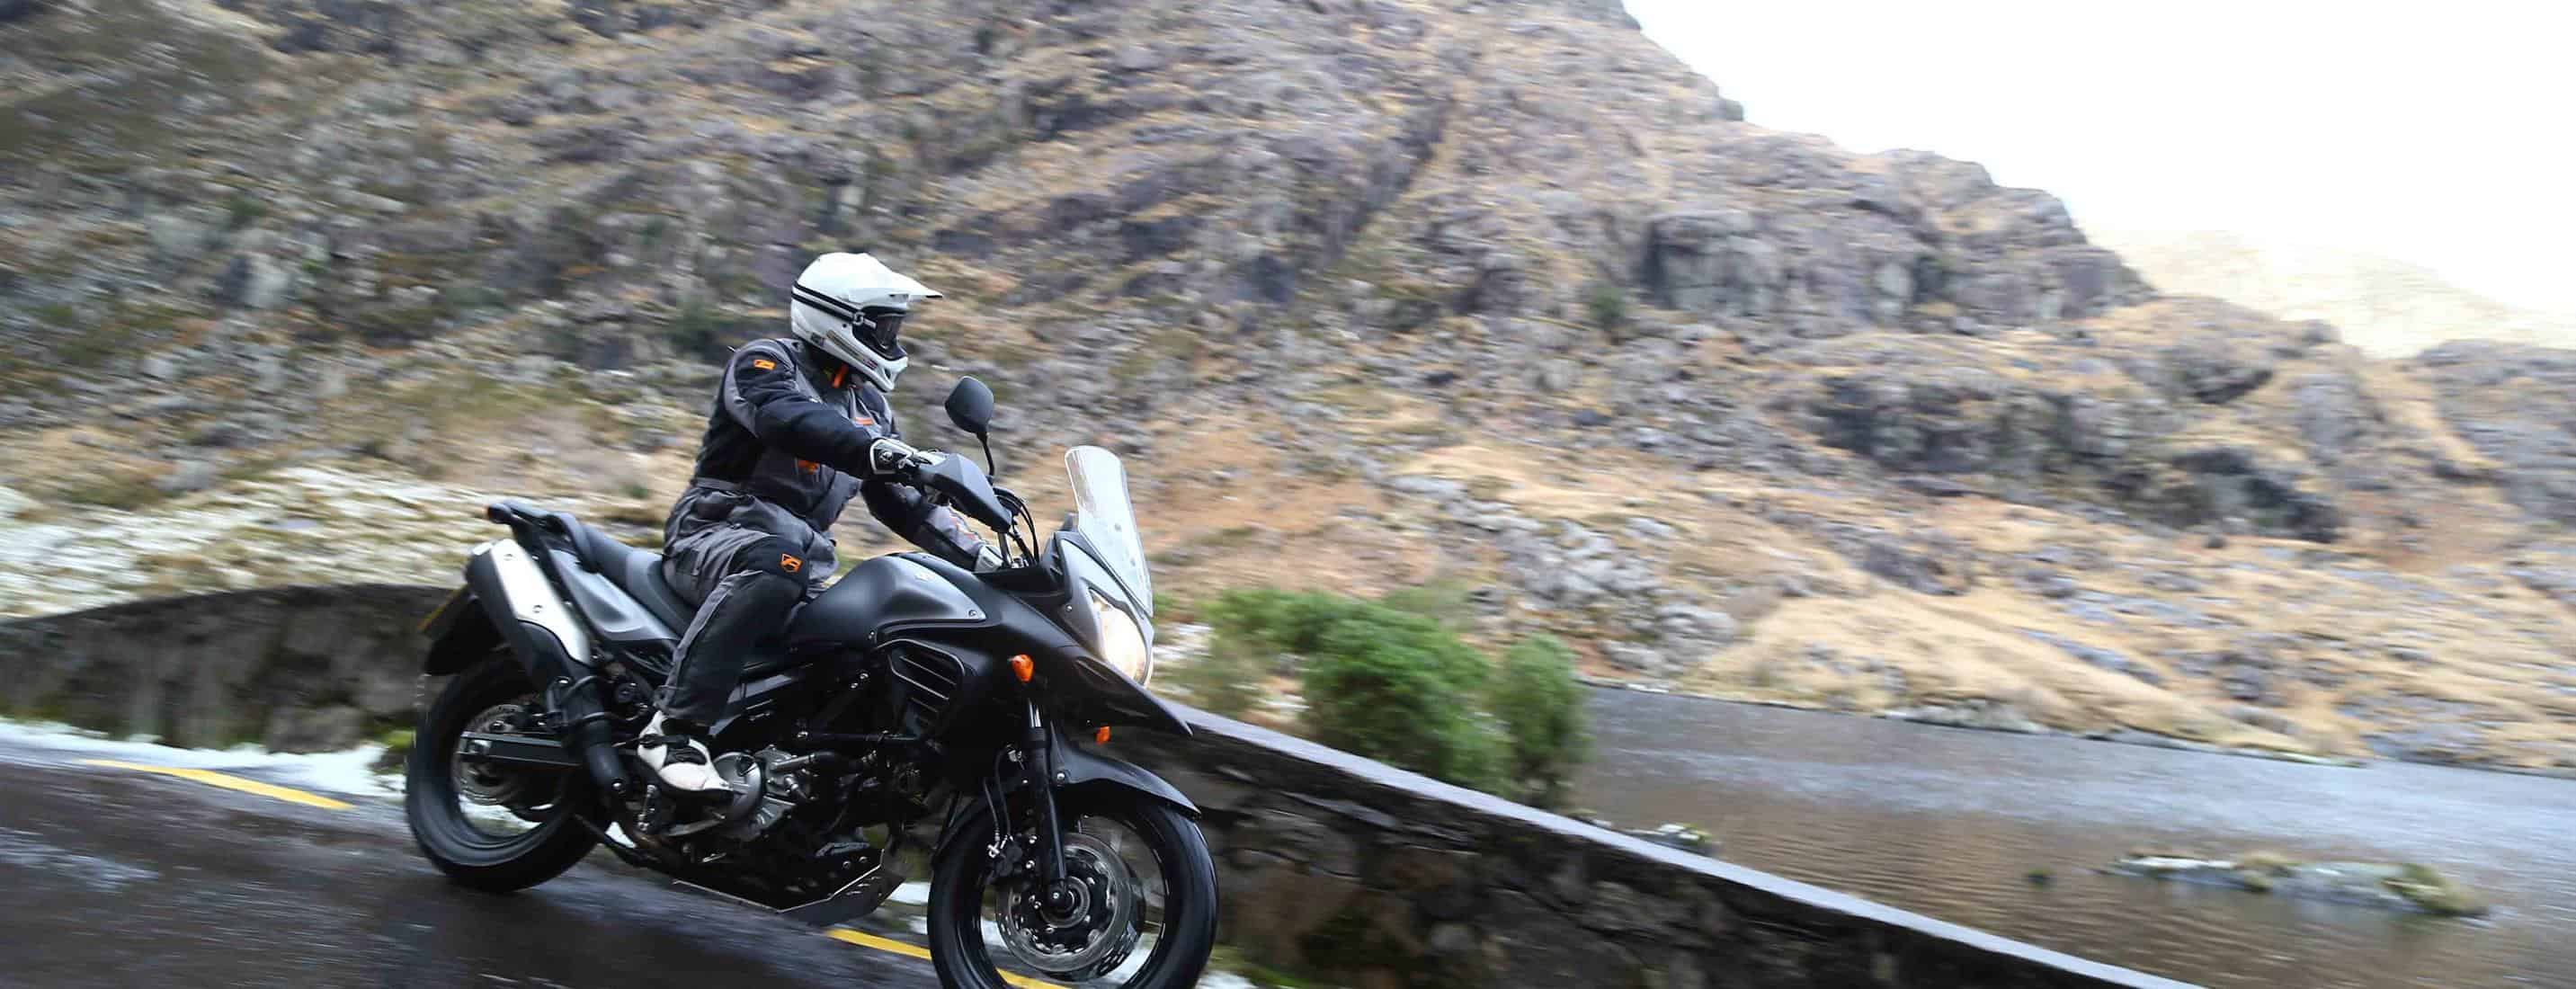
And this was not before we’d spent quite some time boosting the off-road capability of our Suzuki V-Strom 650XT long termer, the bike we’d chosen to ride in that rally. It’s a great bike, a proper adventure bike but obviously not as off-road ready as say a Yamaha Tenere 700. So we took the time to add protection where we thought it needed it most. But not a whole big deal, after all no one wants to take excess poundage into the desert.
Thwarted on our Saharan aspirations we instead headed north and rode Rally Moto’s Kielder 500 up on the Scottish borders and there we proved, yes, the V-Strom 650XT is great on gravel roads and more than fine for a little off-roading. And the upgrades we added – yes, they were all good for the job too.
So here’s what we upgraded…
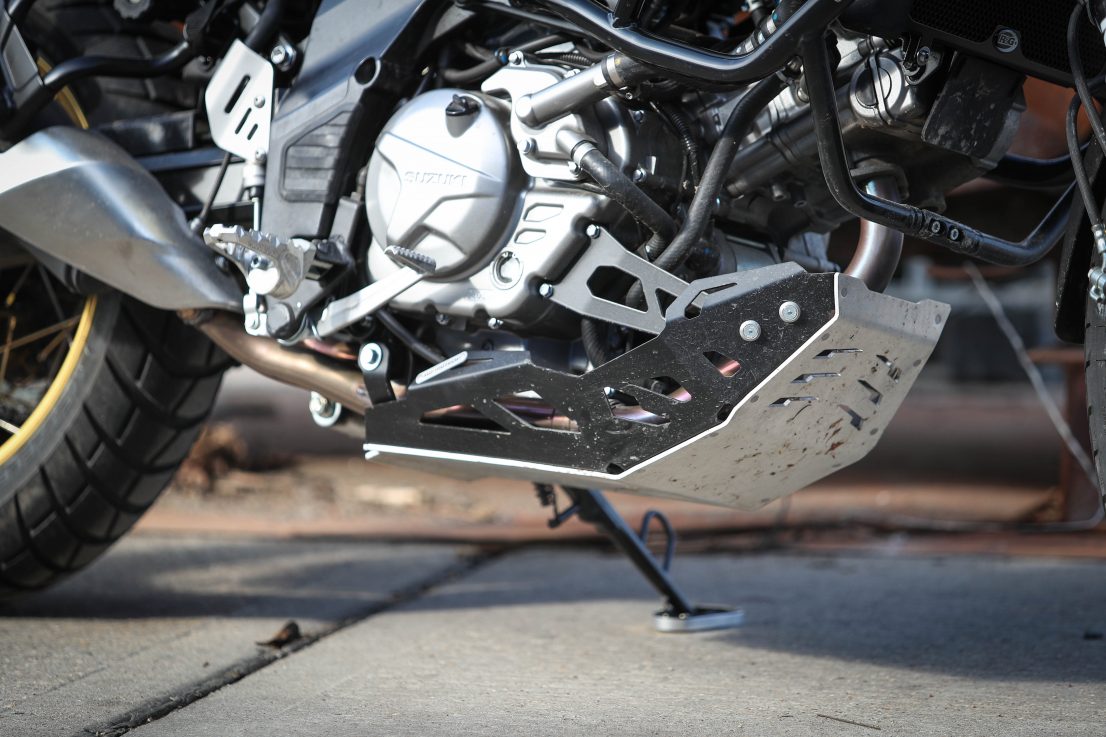
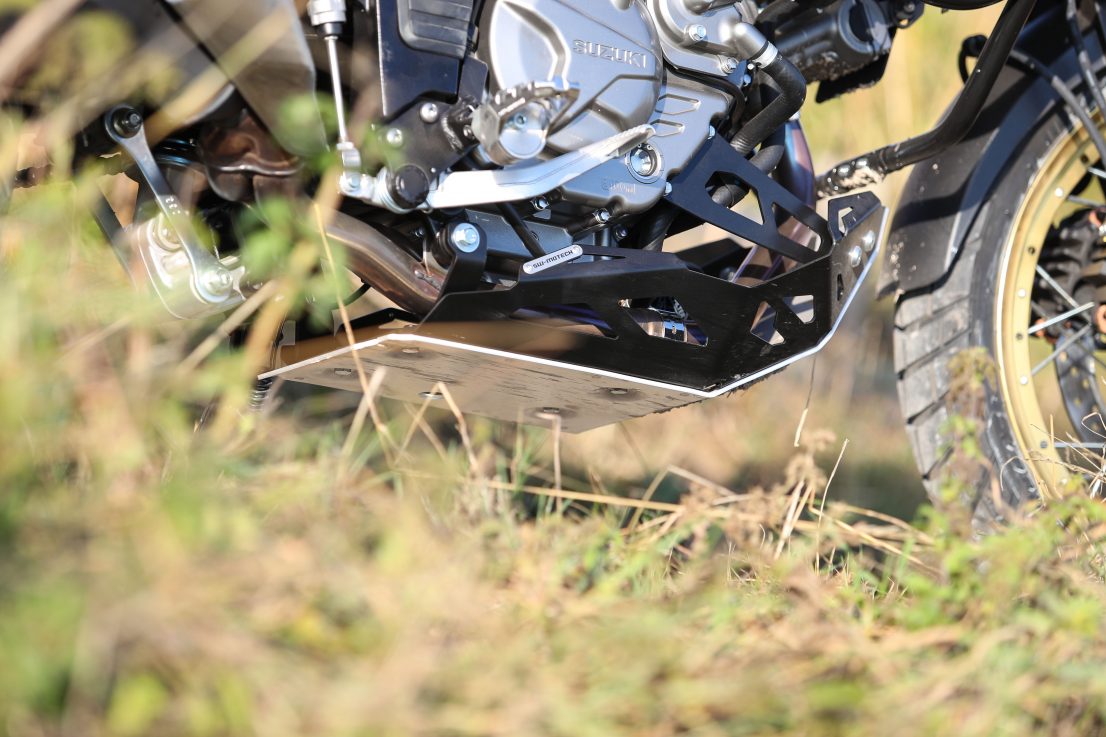
SW Motech bash plate
With an under-slung exhaust, no lower frame rails and the oil filter hanging right out the front of the motor, a decent bash (sump) plate is right on the top of the list of must haves.
The SW Motech engine guard does the job handsomely. Fitting is a matter of removing the OEM under-engine plastic cowl (a purely aesthetic item) then fitting the two under engine brackets supplied by SW Motech (one of which requires temporary removal of the sidestand – so I lent the bike against a wall for this part, a paddock stand would have been a better idea) and two brackets that angle off the front of the engine. In all there are eight fasteners for the guard and as always with these things the best modus is to fit everything up loose until you have the plate properly located then tighten into place. I was super-careful on this, using my Teng Tools torque wrench and some thread lock to make sure everything was just right.
And I was glad I did, first ride off road I skidded over an unexpected rock step and belted the guard – and all was just fine.
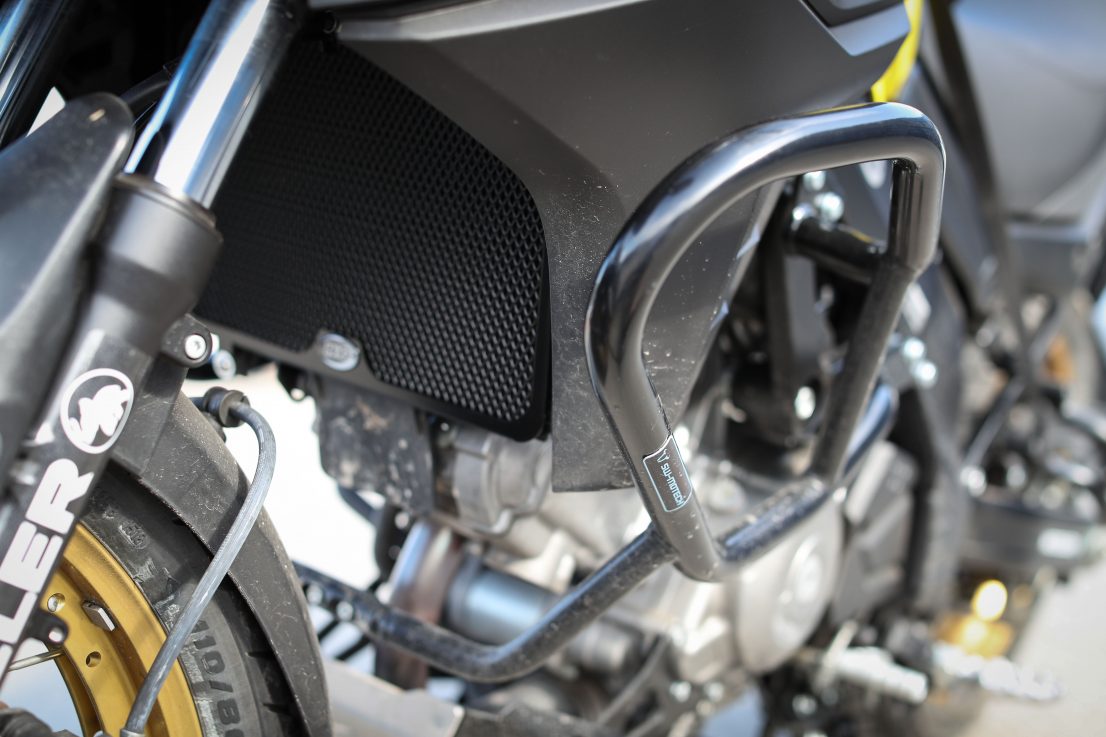
SW Motech crashbars
These are a sturdy item for sure. I hope I never need them, but there again I hope they do their job well if I do, as there’s a weight penalty with all this protection, so we want that weight to bring something of a reward.
Again these are a doddle to fit, with the main fixing points being connected to the engine-frame bolts on either side of the V-Strom’s alloy beam frame. SW Motech supply longer bolts for this job and the only trick I could see was to make sure you didn’t remove all the bolts at one time (you could imagine the engine falling on the floor!). Again I set up each side loosely and connected the joining bar at the front before torqueing it all down. A very simple job.
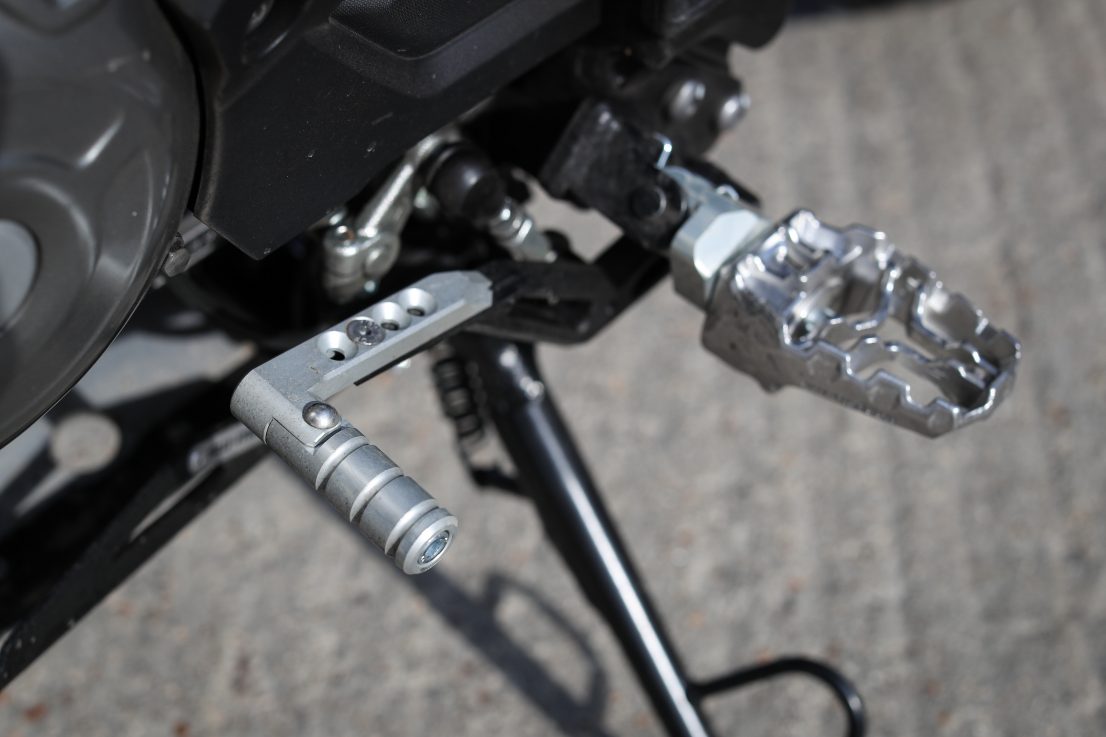
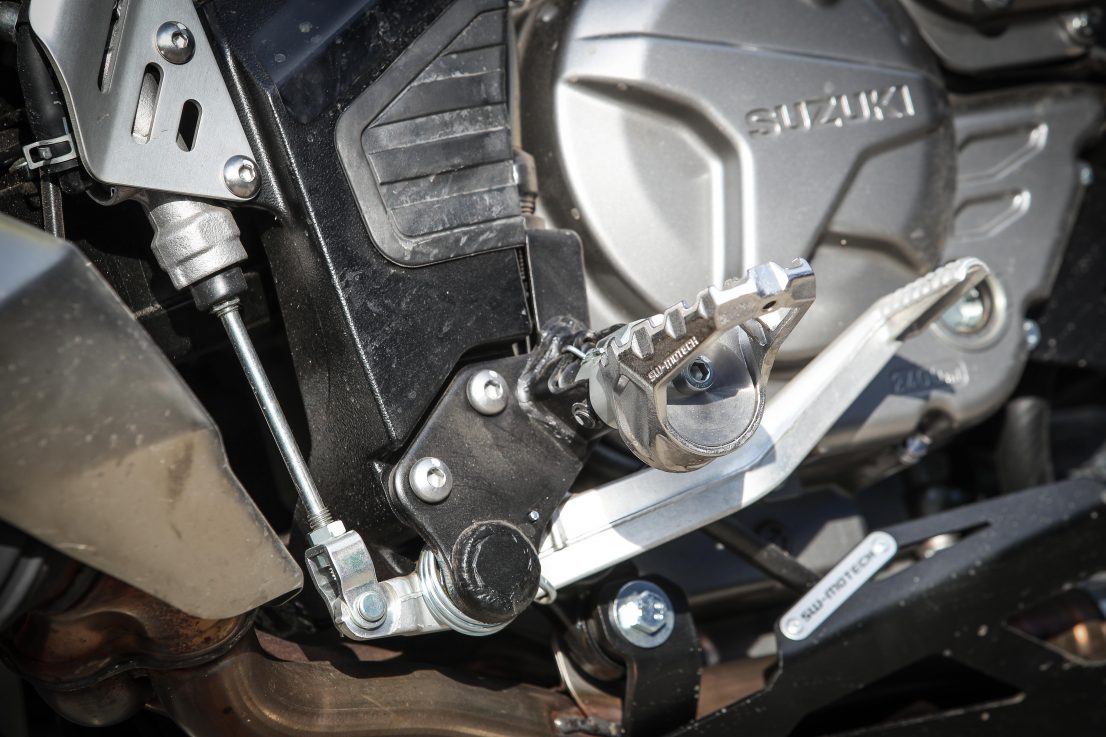
SW Motech gear lever
The standard gear lever looks like an obvious victim in a fall, so swapping this out for one with a folding-end was essential. As with all this SW Motech kit, this is a nicely made component and I like that the length is adjustable (handy when you’re a size 12 boot, like me). I only wish these guys made a folding brake lever too. I can’t find one anywhere, so it looks like I’ll just have to take my chances there.
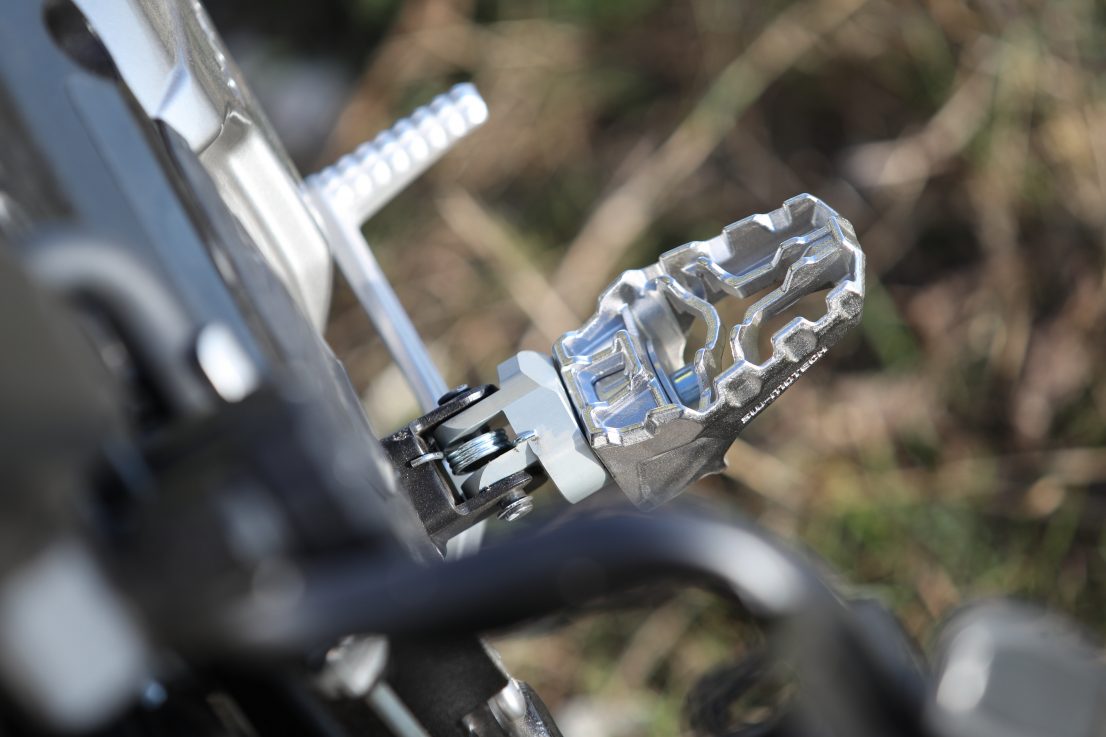
SW Motech Evo footrests
There’s no going anywhere off-road on the standard rubber-top footrests. Again SW Motech have the answer with these Evo pegs which offer a serrated base peg plus a removable rubber top for comfortable road riding. They’re not as aggressive as normal enduro pegs, but they suit the cross-over nature of the V-Strom perfectly.
Even more useful is that these are extremely adjustable for height, for forward and back position as well as angle (36 possible positions). And this has brought a big reward, for in picking the lowest setting I now have something like 15mm extra legroom. Which makes standing (as well as sitting) much more comfortable. It also automatically brings the brake and gear levers up into a better position for standing riding with motocross boots (in fact I have to readjust the gear lever back down as it’s now too high!).
Proper enduro guys will be shocked at just how heavy these pegs are (no pain no gain) but the weight is low down and hey, this is adventure!
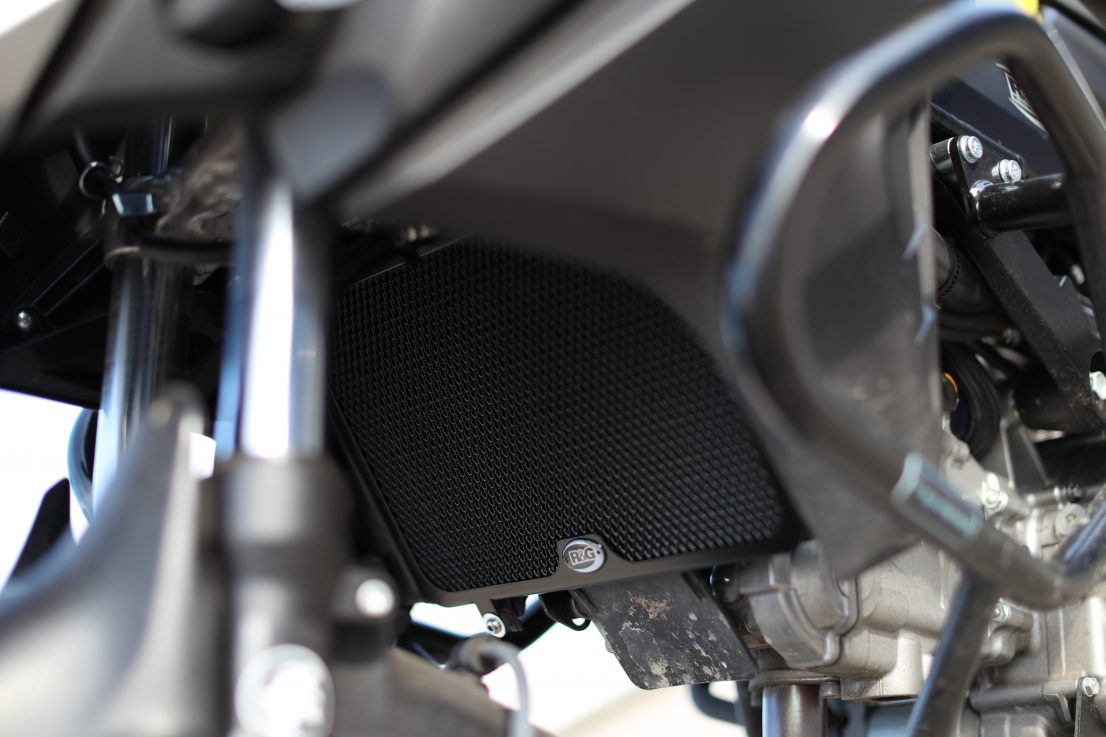
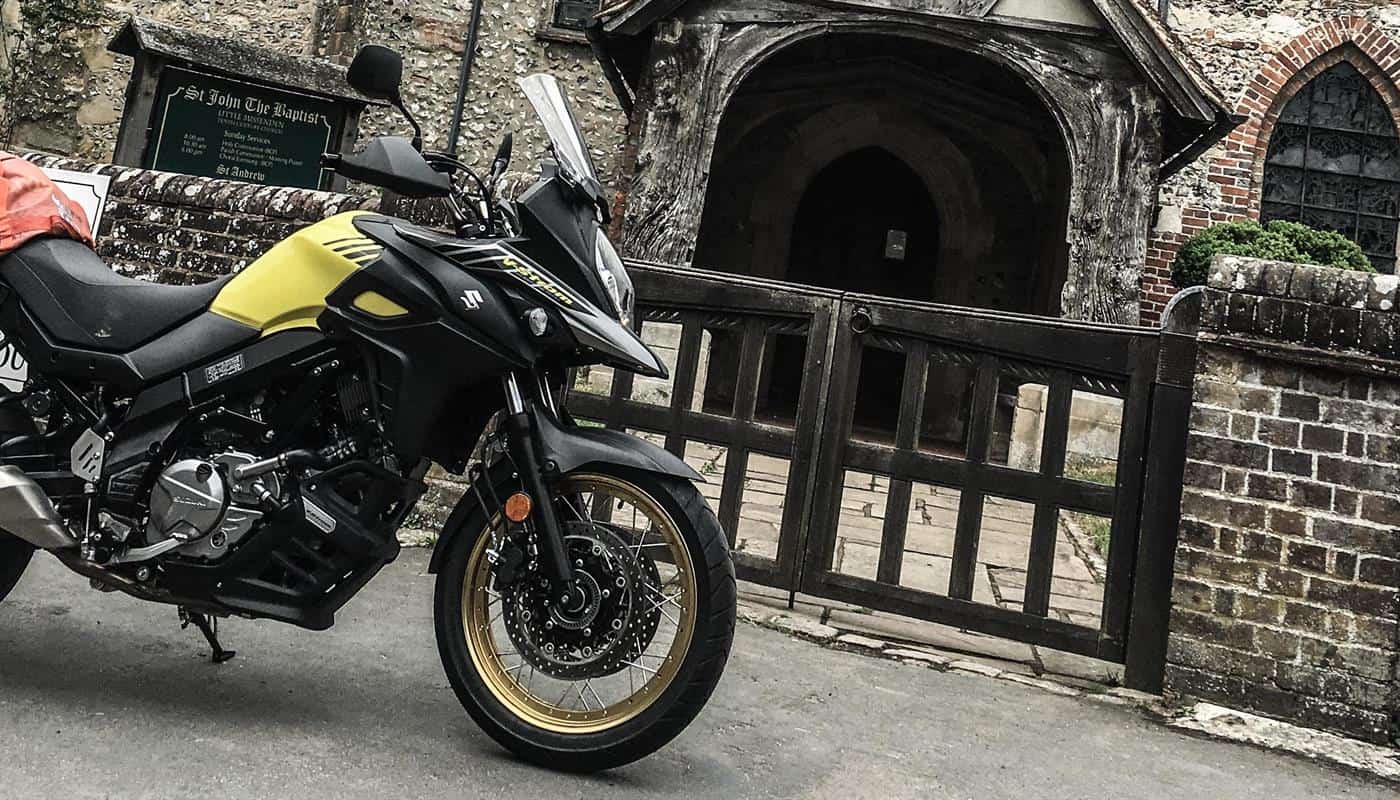
R&G radiator guard
A quick look under the fairing revealed a fairly handsome radiator with no protection. You can’t go riding gravel like that. The guard from R&G is a neat super-easy to fit grill. Probably went on in five minutes flat, the trickiest bit being feeding the mini cable ties into place. It’s peace of mind having that guard there.
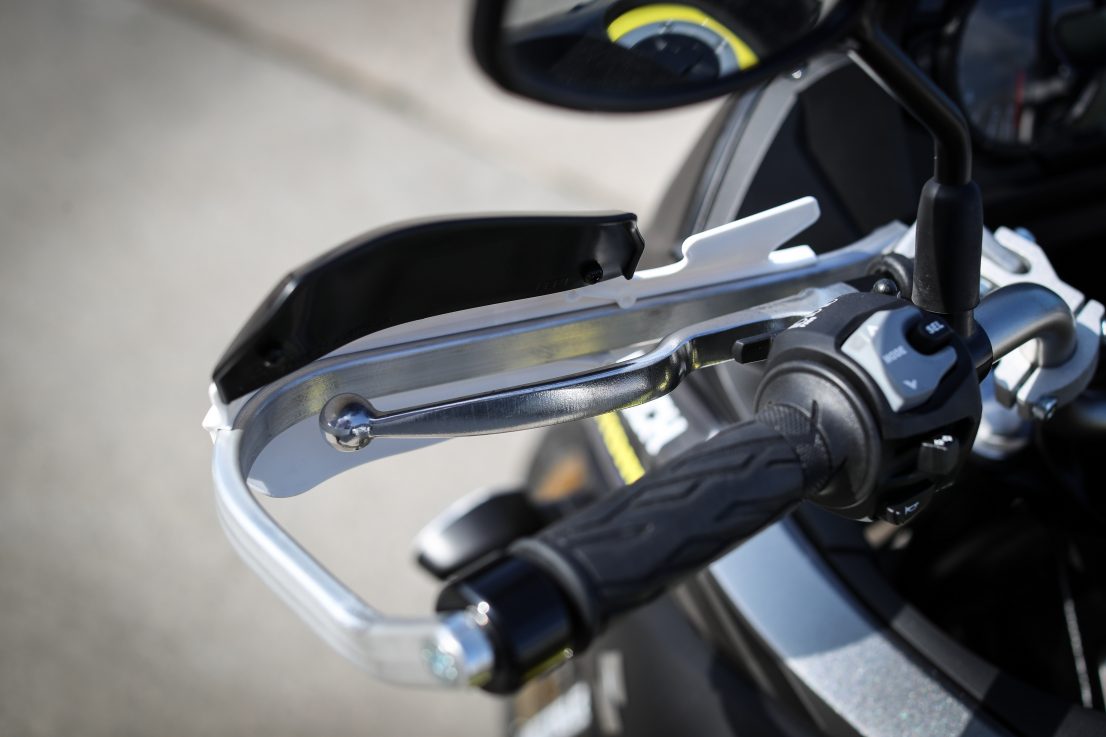
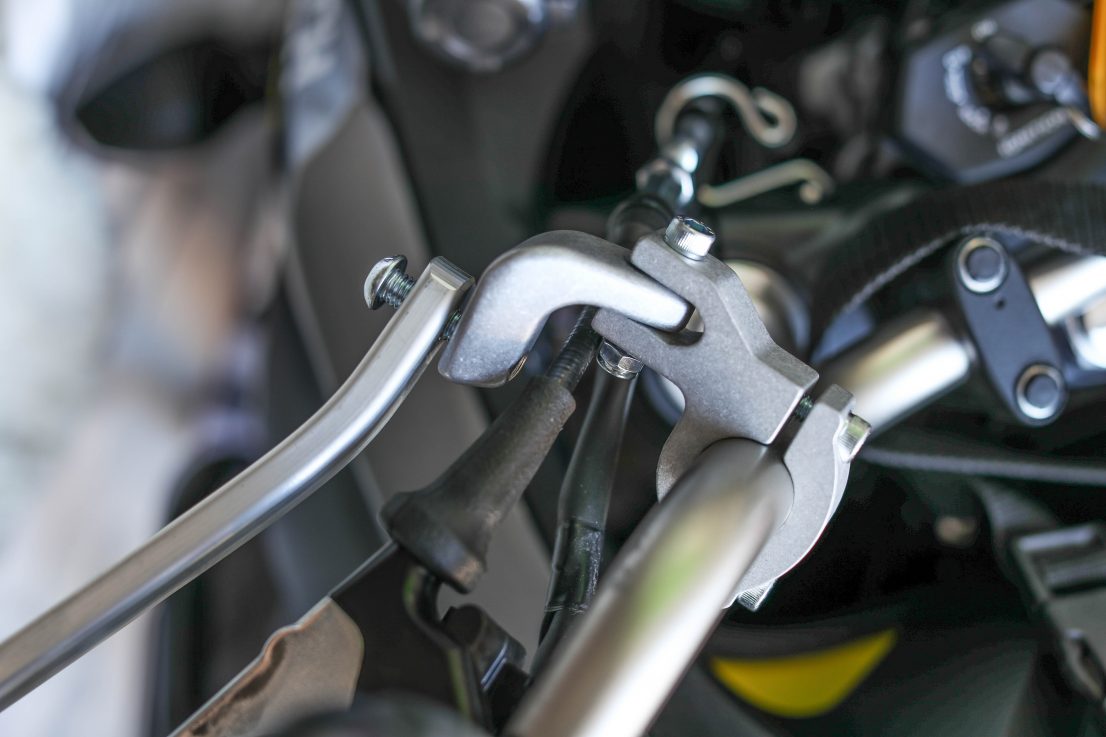
Barkbusters hand guards
I had Barkbusters on the Husky TE650 I rode in Australia in 2016 and they really impressed me with the build quality and the fit, so I was keen to spec them again for this job.
But I need to back-up a bit here. First off, I’m retaining the stock bars. I looked to replace them, but given the limitation on the control cable lengths there was little wriggle room. As well, finding off-road bars with enough straight length to accommodate all the controls and switches was proving difficult. And finally, having tried riding the V-Strom with the bars rotated forward I was getting a fairly decent ride position in any case – and they look pretty decent quality. So, I’ve decided – leave as is!
That’s also put the Barkbusters in pole position as choice of hand gaurd as these ones are custom made for the V-Strom so all the fixings properly clear all the brake lines, banjos, clamps etc. It’s a close-fit, but everything fits sweetly and I’m much happier knowing the levers and controls are protected by that aluminium bar – again when you’ve got the best part of 230 kilos driving into the ground components like levers and brake reservoirs need good protection.
R&G kickstand shoe
Yep, the V-Strom needed this. There’s no centrestand (it’s an optional extra – which I’d probably have for long term ownership) and the kickstand has a small foot that would be decidedly marginal in soft terrain. The shoe by R&G effectively doubles the footprint of the kickstand so hopefully we should be okay in anything up to (but not including) fesh-fesh!
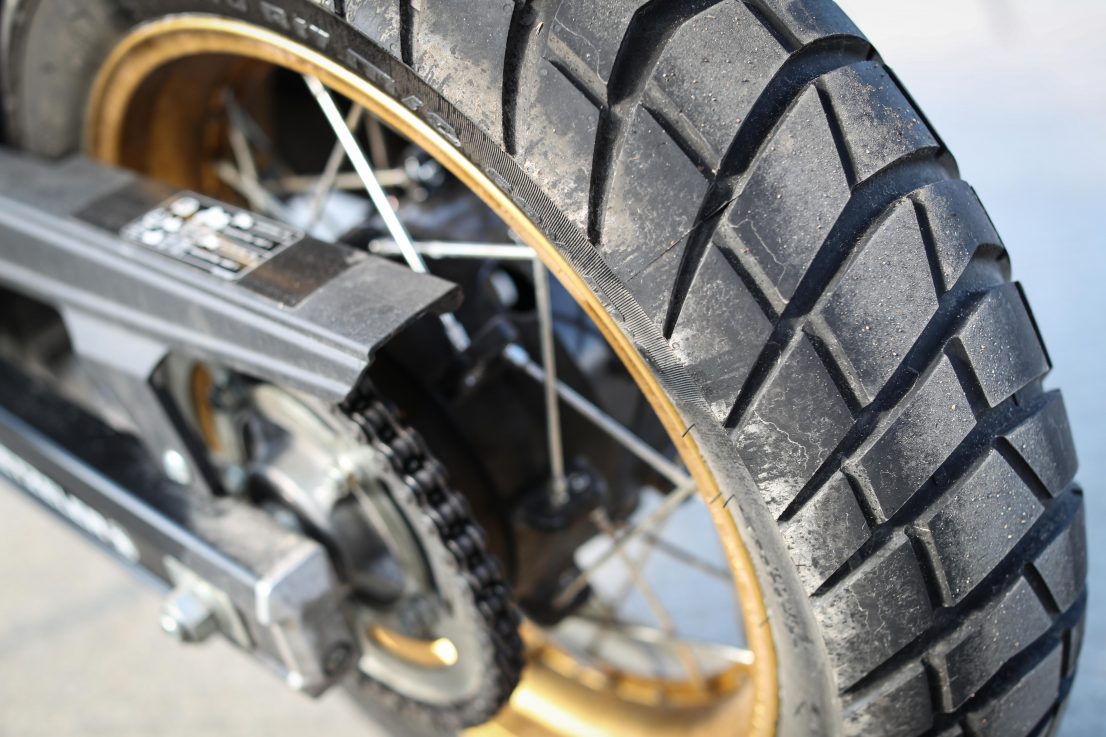
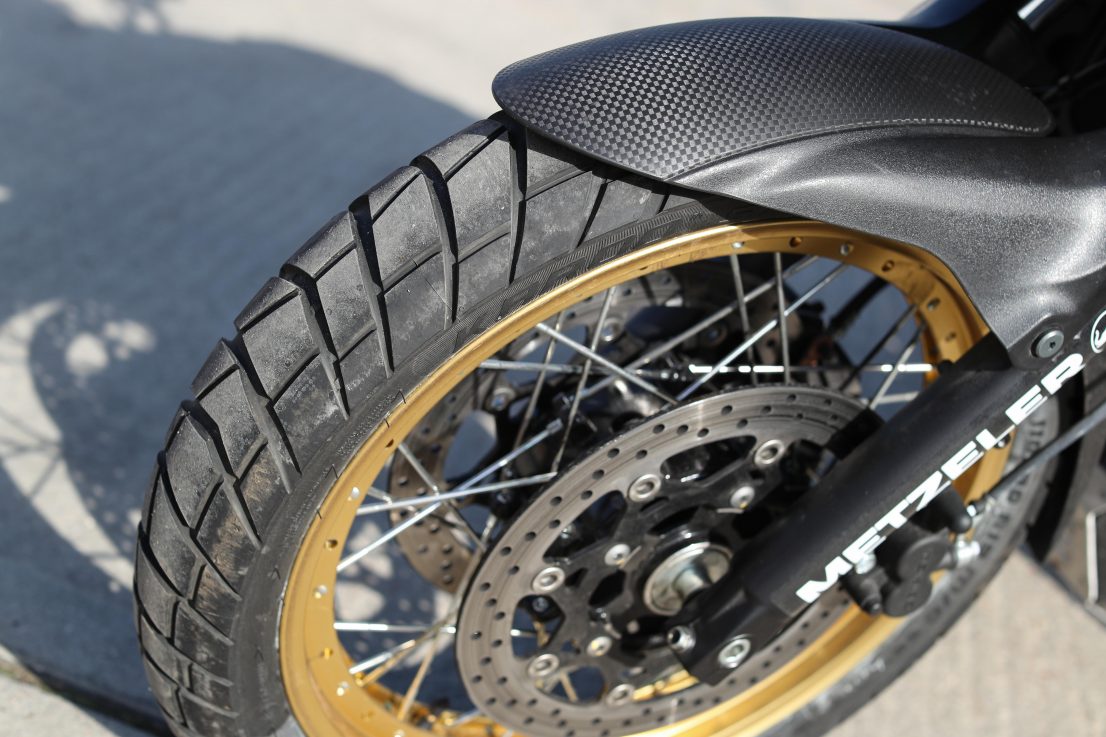
Metzeler Karoo Streets
Now tyres are an area of much debate. My choice here has been partly determined by the need (want?) to ride to and from Morocco and to compete in the event all on the one set of tyres. With probably 6000km to cover that’s on the very limit of what a set of regular dirt-biased adventure tyres can do. Note here that I also want decent street performance, I don’t like the idea of sliding down wet tarmac because a distance-oriented tyre lacked grip at a crucial moment.
So I’ve come up with these – Metzeler Karro Streets. I’ve ridden a lot on Karoo 3s, the pukka off-road adventure tyres, which are great, but I’m not sure they’ll last the distance, whereas this lower-knob profile version of the same tyre offers that extra mileage – albeit with the trade-off of less aggressive knobs for the off-road (yeah, avoid mud).
I’m not absolutely certain they’re the right choice, so I’m going to test them as much as I can in the UK before committing to them for the event. It might just be, that with the V-Strom being a 650, not a power-crazy 1200, that it could do the whole tour on Karoo 3s (anybody got experience of this?), which of course would be my first choice. But hey, these Streets are proving great so far. They’re much quieter on the tar seal, and were very secure in the wet, and riding hard pack dry trails they were pretty impressive (even on road pressures). In all, they’re a great compromise for the Adventure bike rider who only dabbles occasionally off-road.
Happiness is a great bike with just enough adventure-fettling for a care-free ride
JB’s TOP FIVE OBSERVATIONS
Workshop time
1 Definitely work slow and carefully, when bolting-on an assembly the best policy is to put it together loose to start with, leaving room to wiggle things into place, only tighten up when everything is right and there’s no undue stress on any one fastener.
2 A good torque wrench is invaluable; where a supplier supplies torque settings, use them! Liquid thread lock is peace of mind, but apply only as the manufacturer suggests, typically one drop is enough, don’t dip or slather the thread in the stuff!
3 Instructions are a nightmare, probably as much for the author as the reader. Even the easiest procedure can read super-complicated, so don’t get fazed. Take the assembly and dry assemble it before putting it on the bike – you’ll find things go together easier than you think and most probably how you put it together instinctively is exactly as the instructions have been trying to tell you…
4 Everything has its price. And we don’t mean money. You add protection – you add weight. There’s no best tyre – a knobbly will be worse than the OEM on the road, but great off-road, and it won’t last as long. Add a kickstand footplate and the bike won’t fall over in the dirt, but the footplate will stick out and maybe snag your boot…
5 In every workshop session you will hit a wall. Something won’t fit or won’t come undone. Do not fight it, try not to get frustrated. Typically there is a solution, you’re just missing a vital clue. So leave it, have a cup of tea or a beer, then come back and look at it again. Still no luck – call a friend. Just don’t go at with the hammer.
Keep up to date with the latest articles, receive our free magazine via email and get notified of special offers and discounts. Be part of the RUST community today…